

Our new Spot gloss machine has amazing capabilities and applications to ay print project. Your business card, brochure, or booklet can now have texture and highlighted glossy features, all making your piece stand out from the crowd (learn more about what spog gloss is here). However, understanding how to properly set up your print piece is critical in having a stunning project. Take a look at our step-by-step guide below!
Adding spot Gloss to a vector image
Adding spot gloss to a vector image is relatively straightforward. We recommend that your designer or whoever created the file also creates the spot gloss files. Please note, you must be using Adobe Illustrator, InDesign, or Photoshop to create these files, programs like Canva will not work.
1. Add a new layer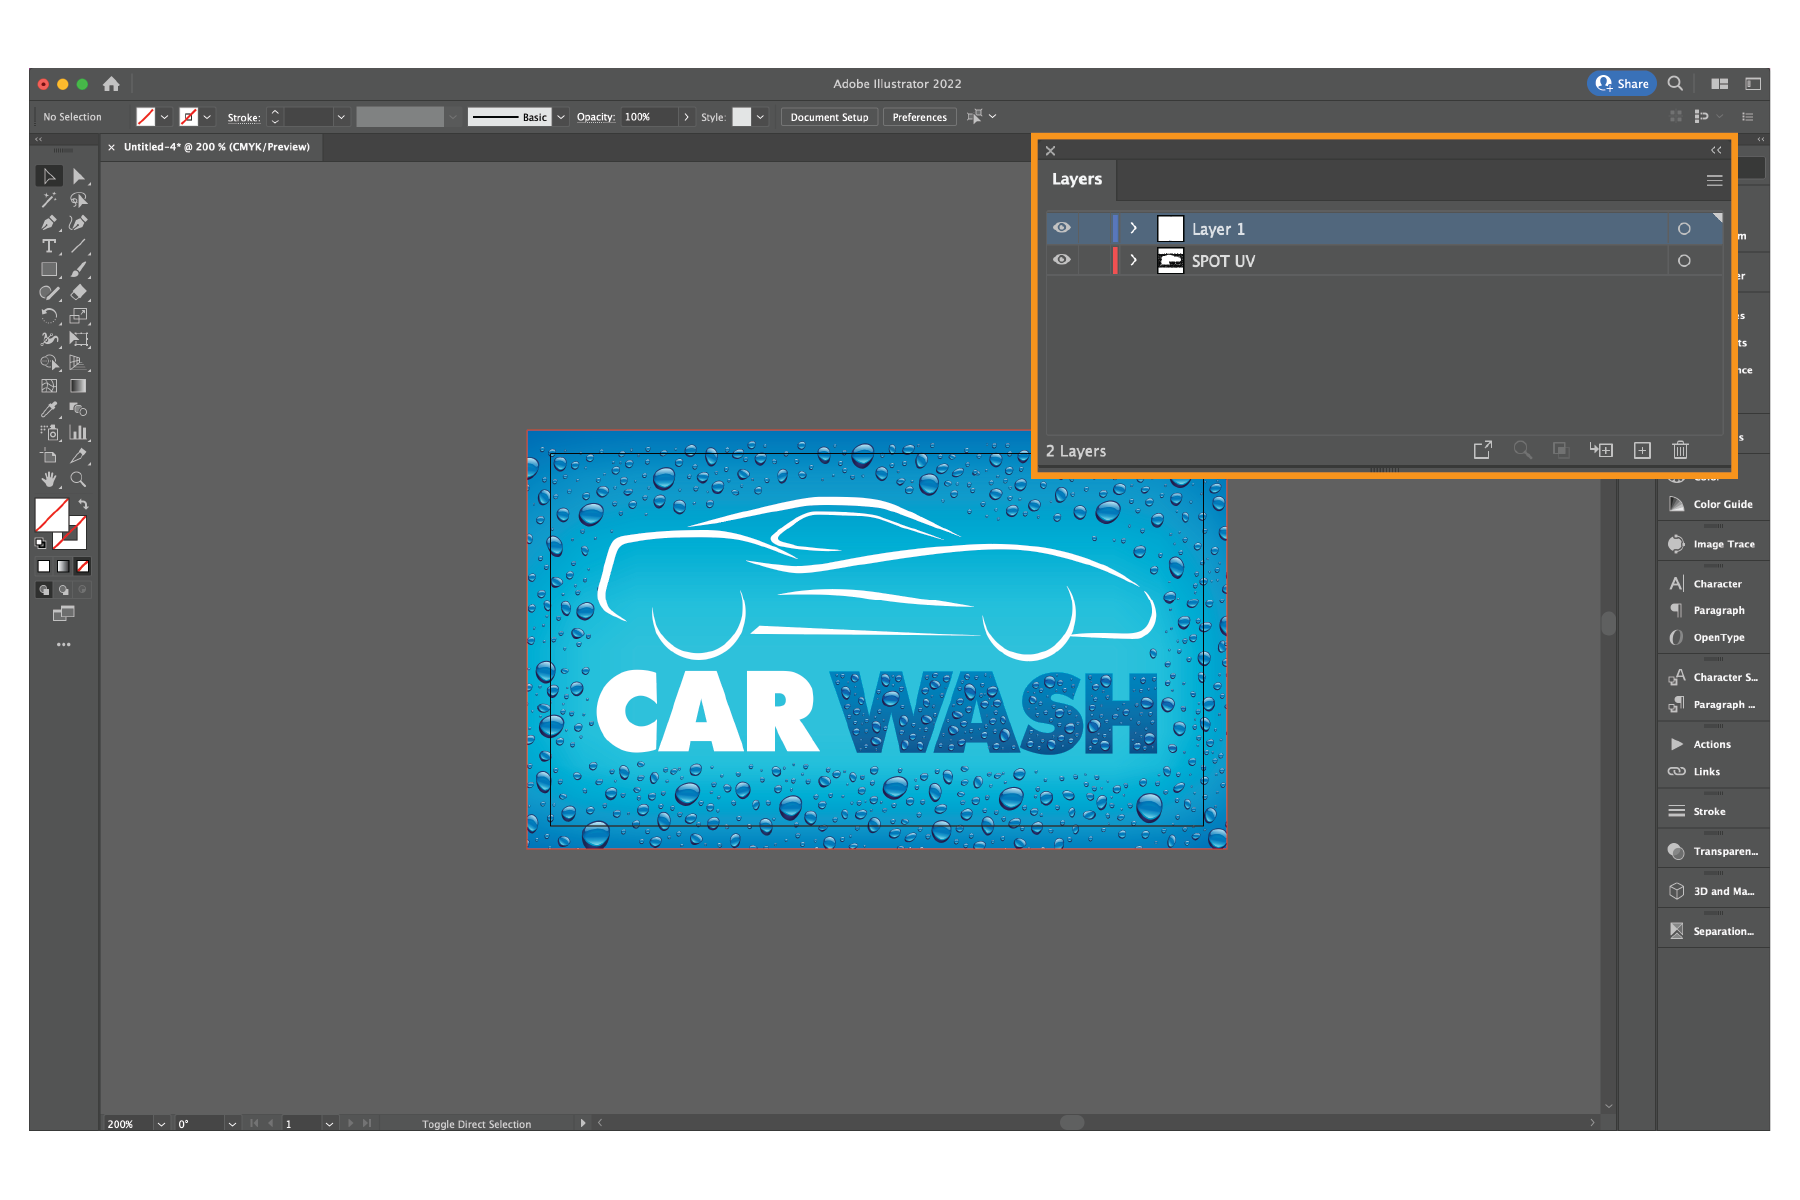
- In your layers panel in Indesign, Illustrator, or Photoshop add another layer and name it “SPOT GLOSS.”
- Make sure the new layer is under your original layer(s).
2. Select the object(s) you wish to have spot gloss
- On the original layer, select the objects you wish to have spot gloss.
- Copy the objects (Command+C or Ctrl+C).
- Select the spot gloss layer (may be best to hide the original layer) and paste in place (Command+F or Ctrl+F) on the spot gloss layer.
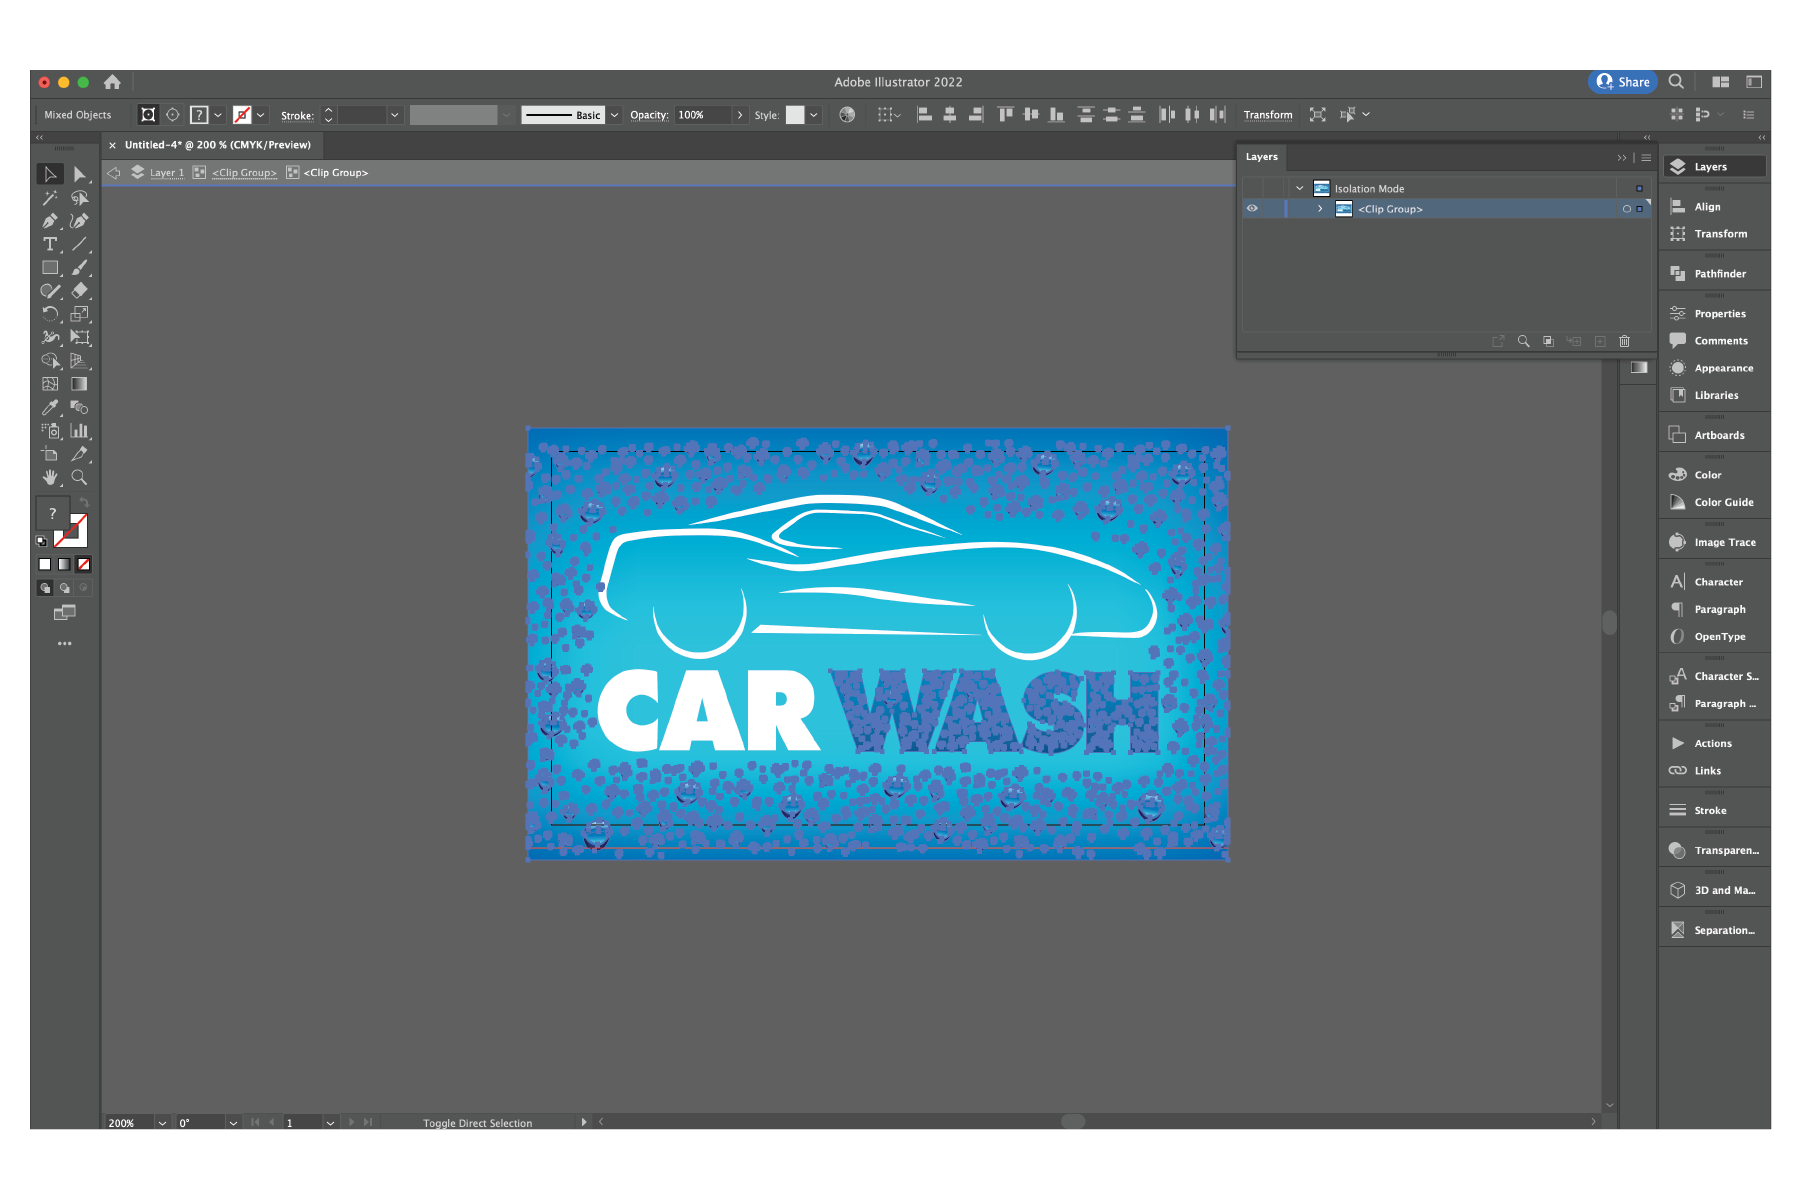
3. Change color of object(s) to 100% black
- Select all objects on the spot gloss layer and change the color to black.
- Be sure to change the color mode to “Grayscale.”
- If you want to adjust the spot gloss intensity you can drag the grayscale percentage to any value between 1%-100%. See more about this in our blog post here.
4. Export separate layers
- When you are exporting your project as a PDF, export one PDF with just the top layer, this will be the PDF used for our printers. Then, export another PDF with only the Spot gloss layer, this PDF will be read by our Duplo machine to add Spot gloss. To see how to properly export your PDF with bleeds check out our blog post here.
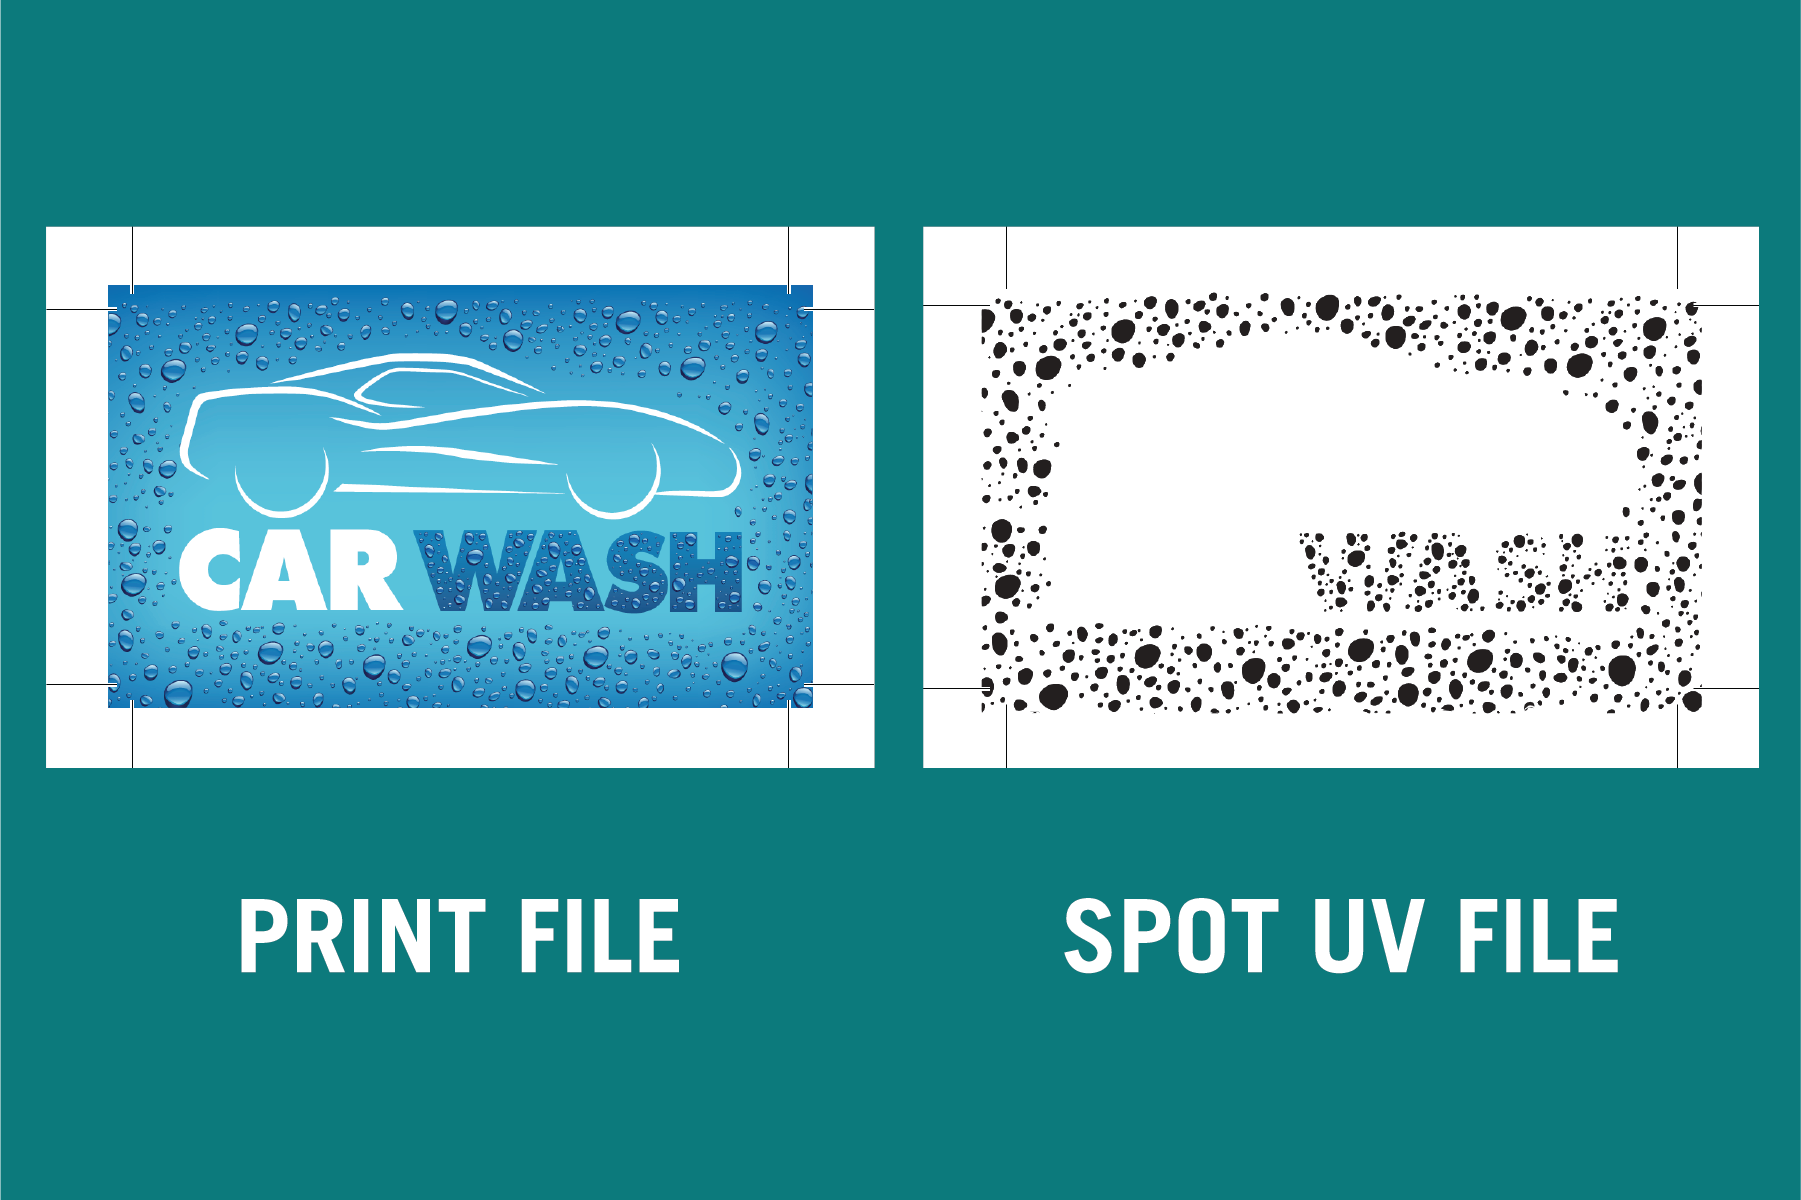
The final product will look something like this!

adding spot uv to a photograph
There are a few methods to add Spot gloss to a file with a photograph, however we are going to show you the easiest method we have found. Please note that if you are looking to add Spot gloss to a file with a photo, you must be using Adobe Illustrator or Photoshop. Adobe Indesign or programs like Canva will NOT work.
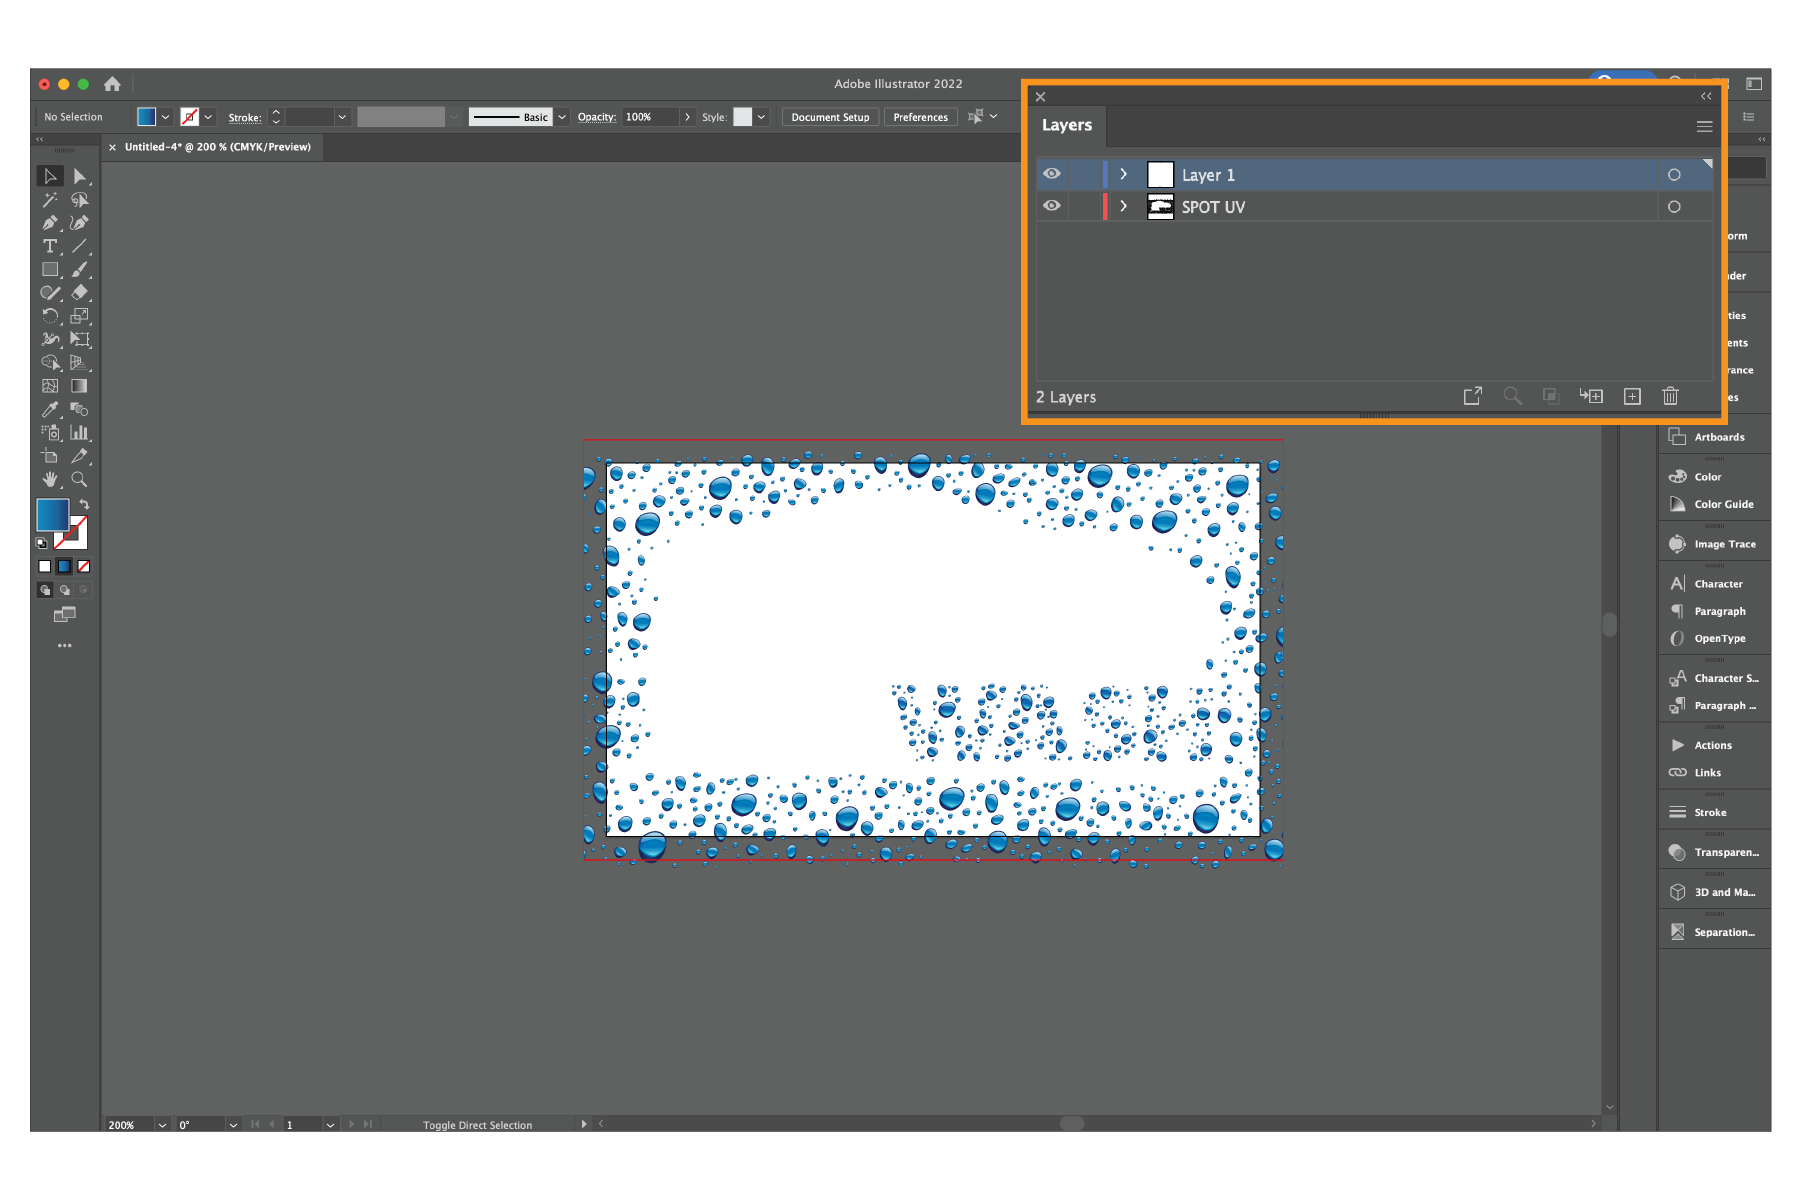
1. Create a Spot Gloss layer
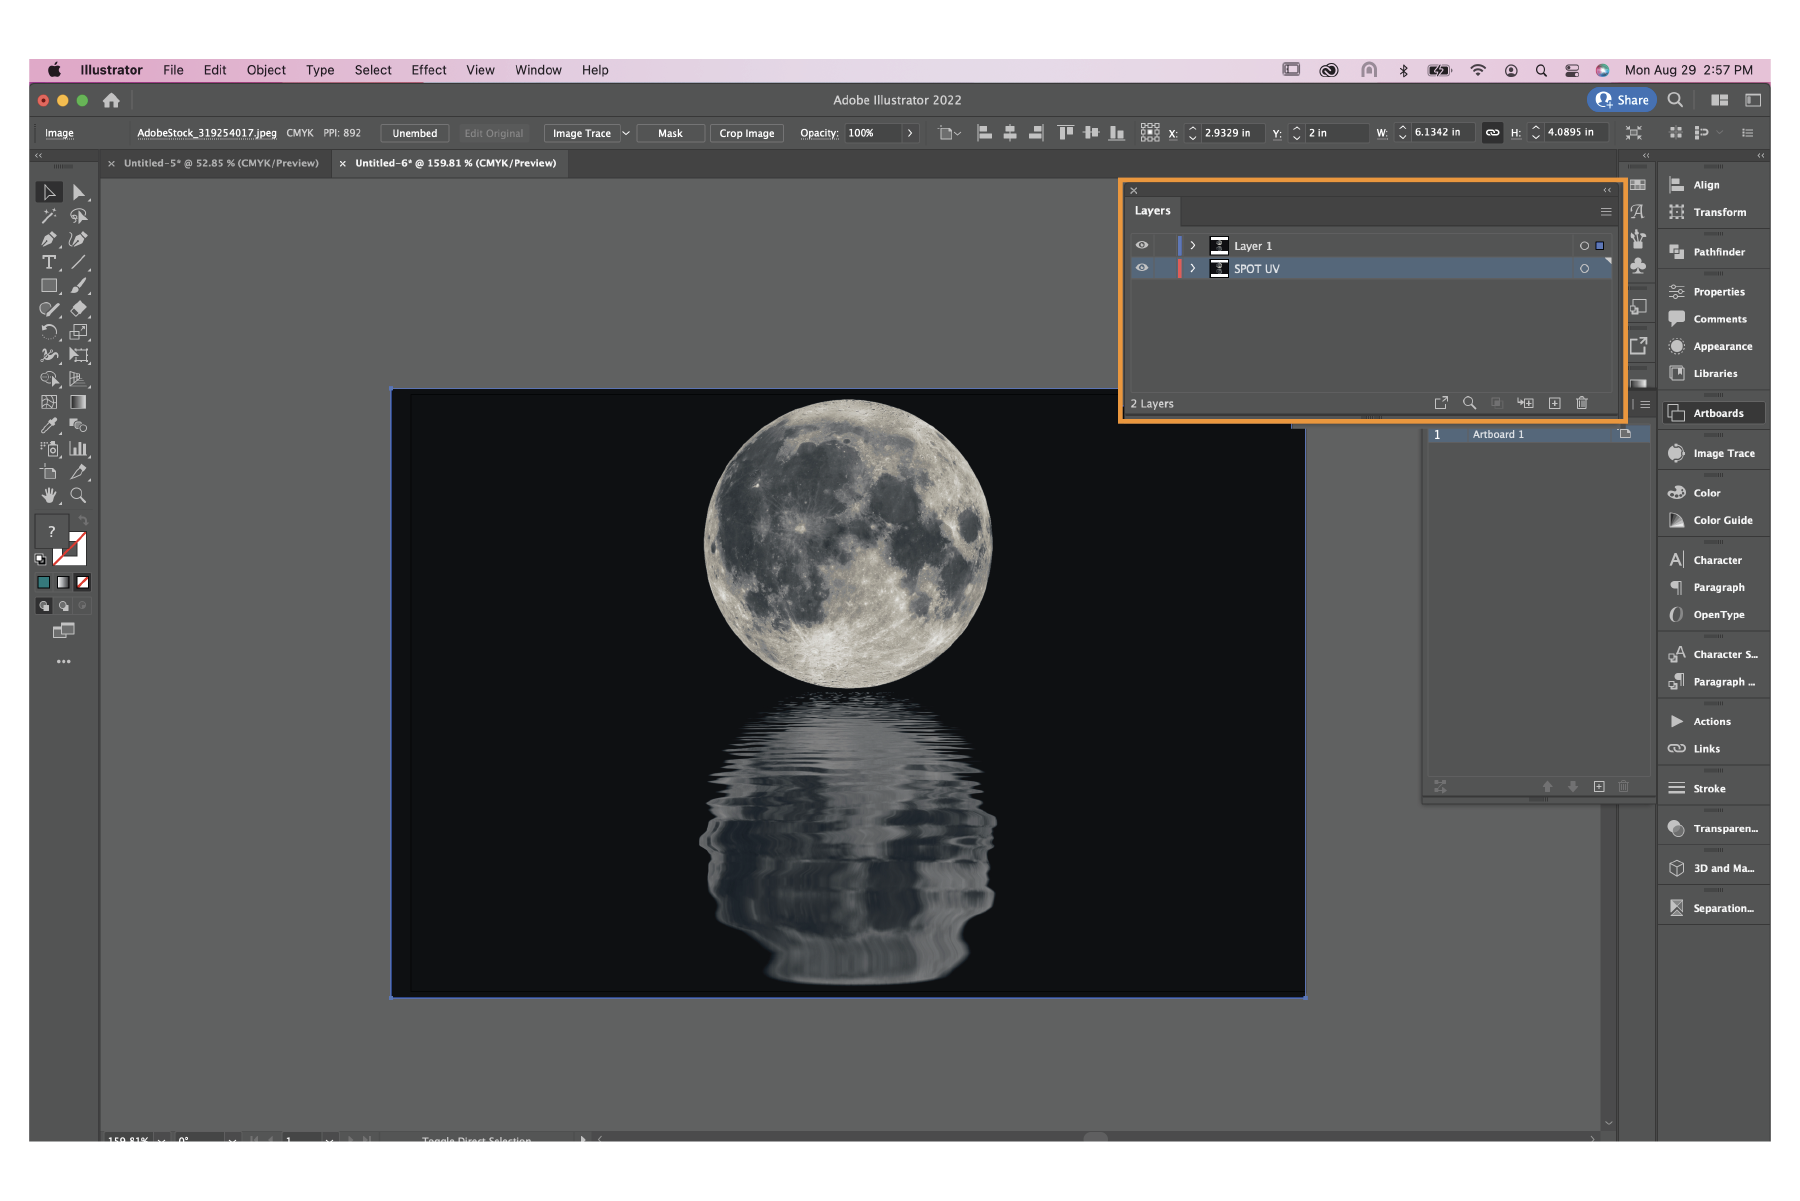
- Create a layer and name it “SPOT GLOSS”.
- Move this new layer to be under your original layer(s).
- Copy your image (Command+C or Ctrl+C) then select the spot gloss layer and paste in place (Command+F or Ctrl+F) then hide all layers except the spot gloss layer until directed to.
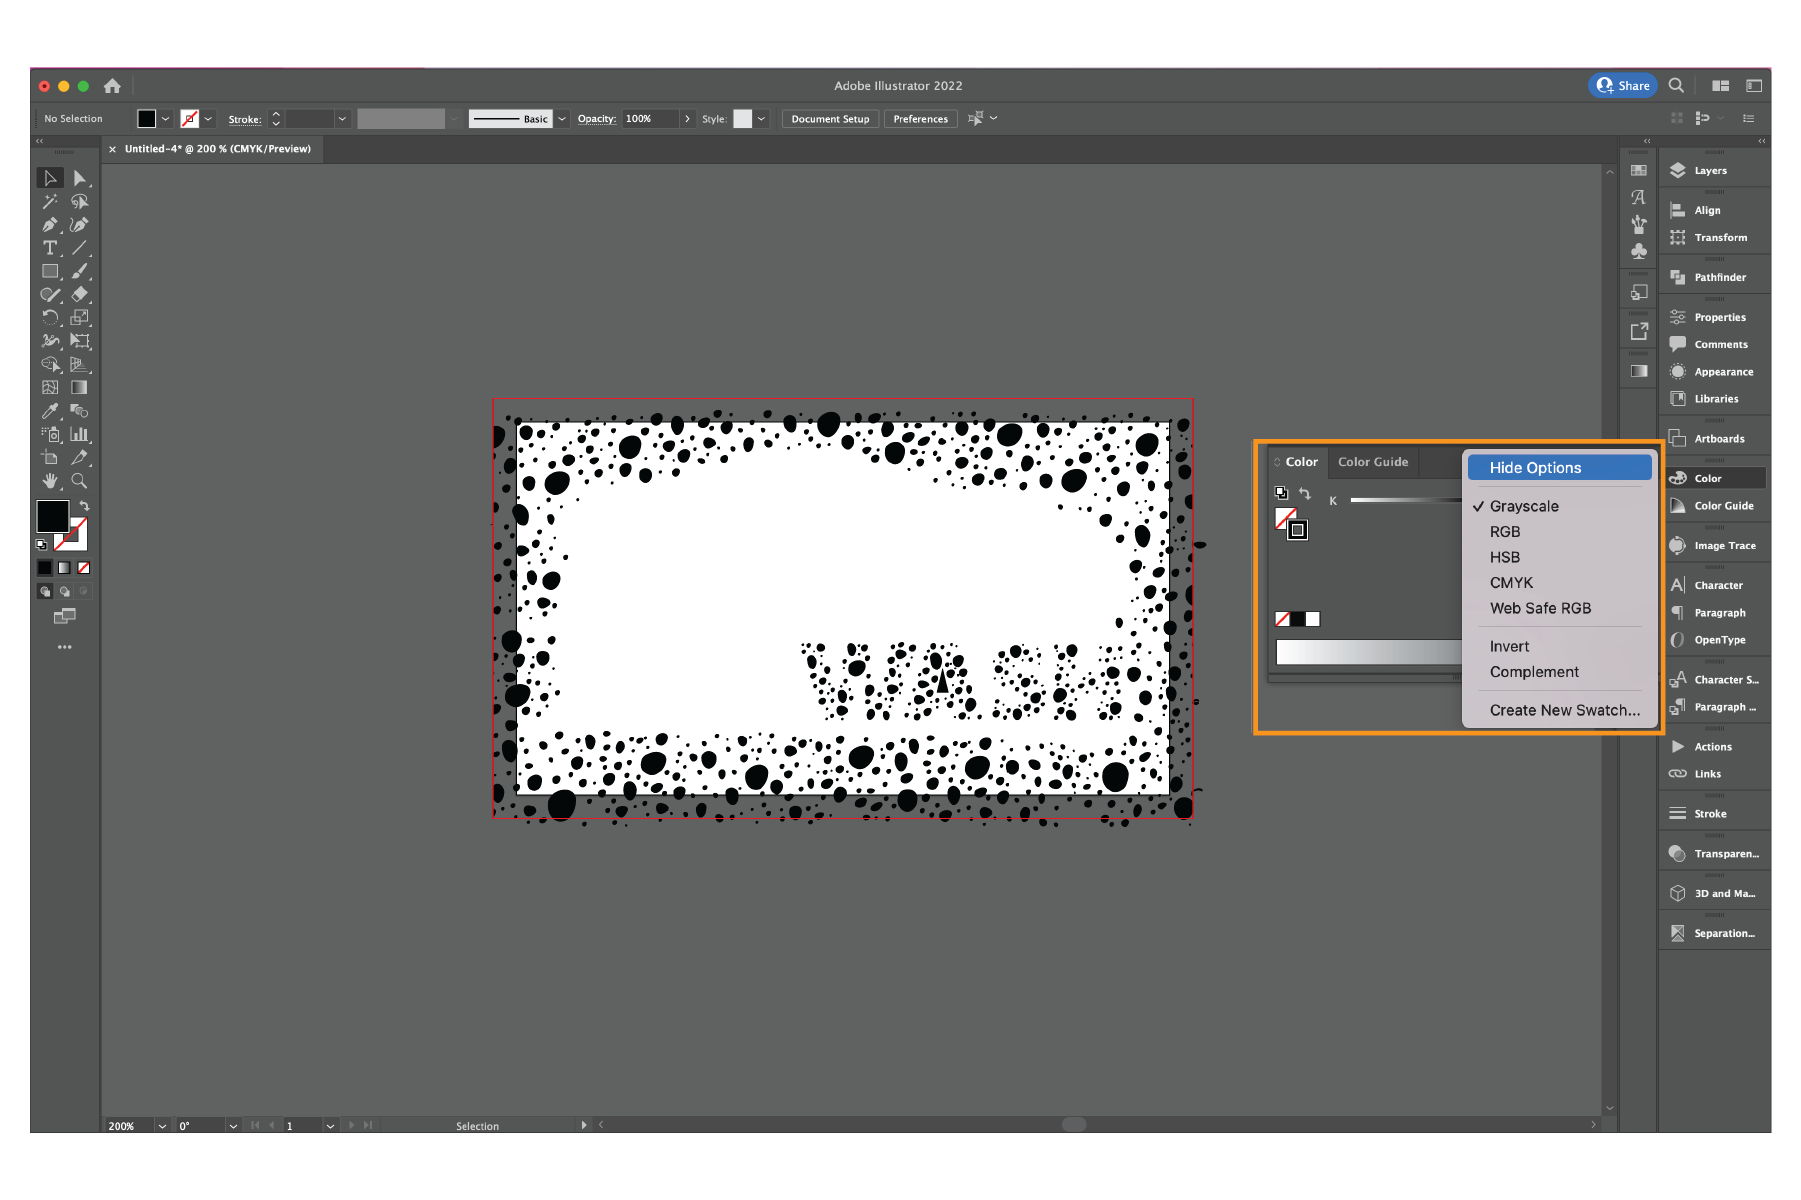
2. Convert your image to grayscale
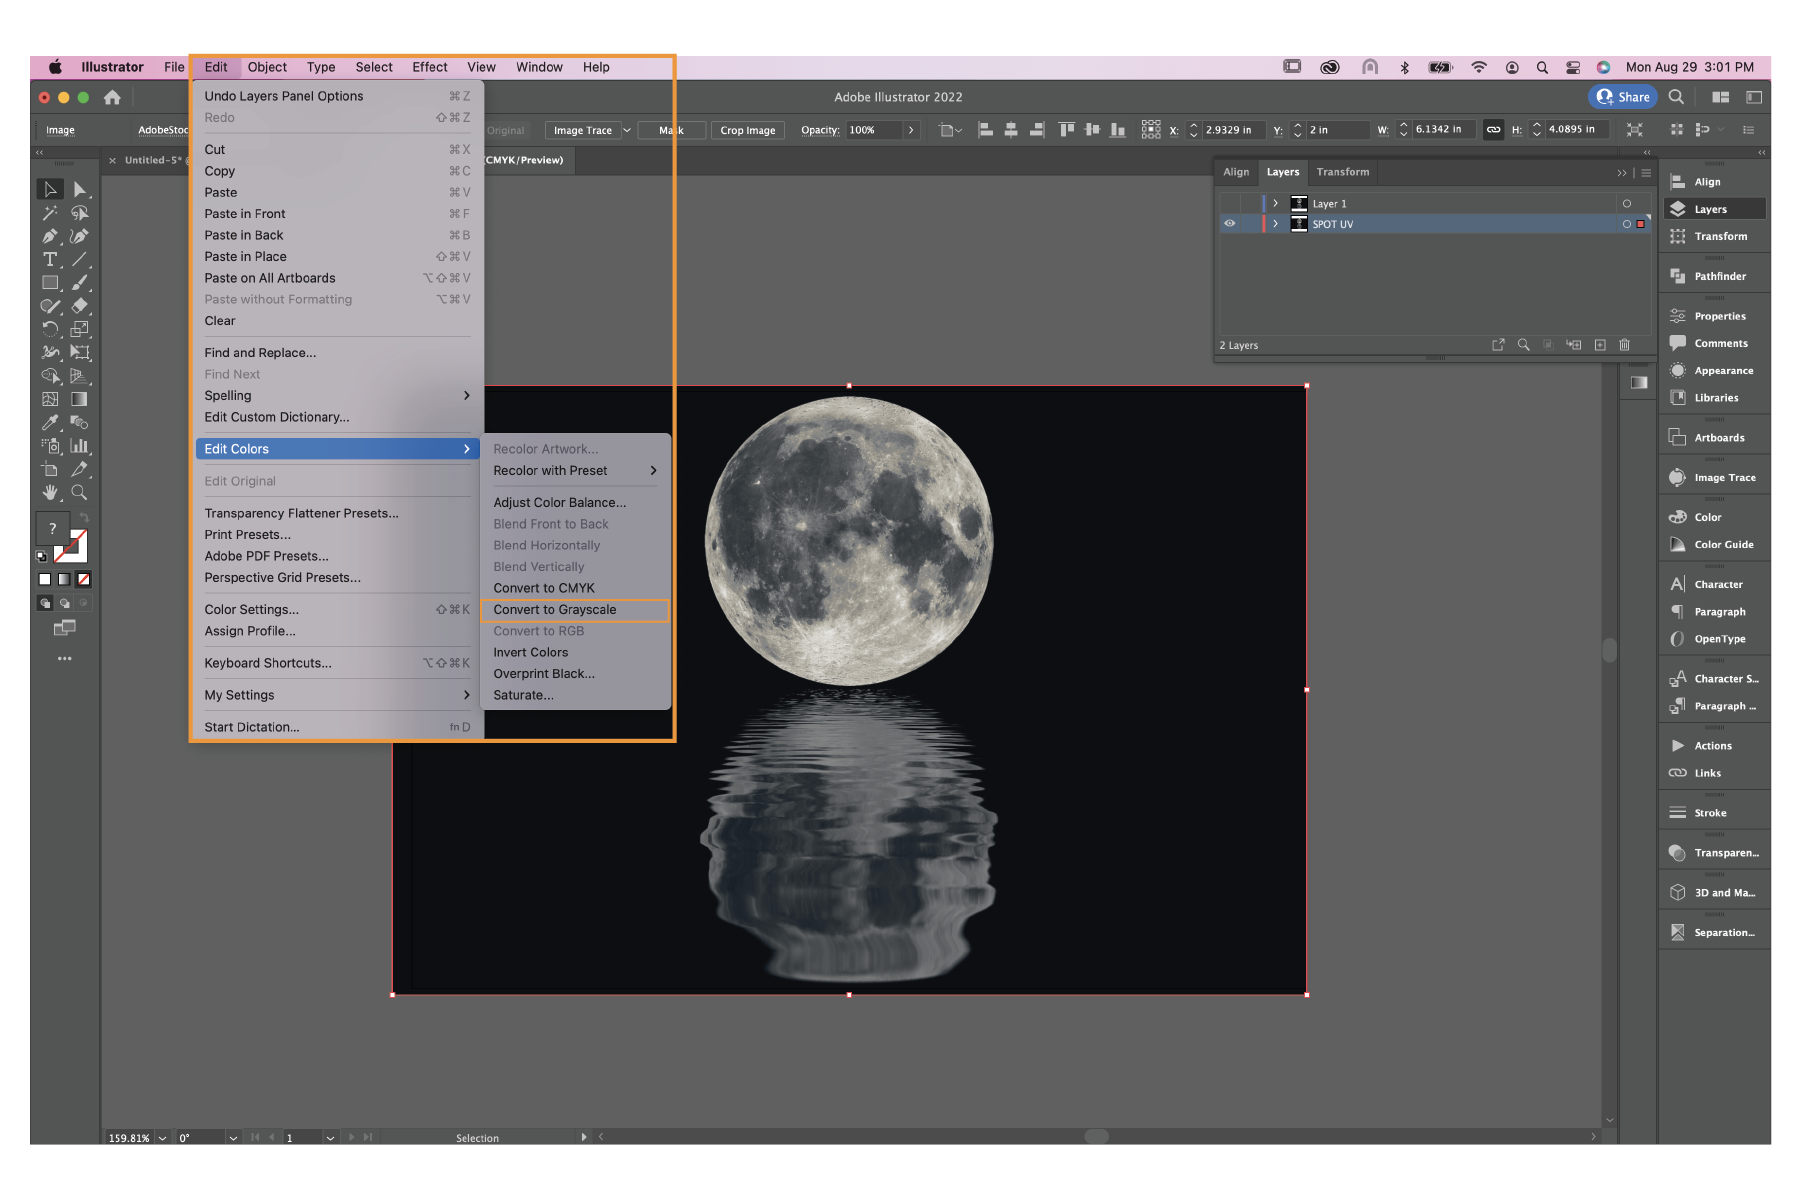
- While selecting your image, go to Edit → Edit Colors → Convert to Grayscale.
3. Add a filter to your image
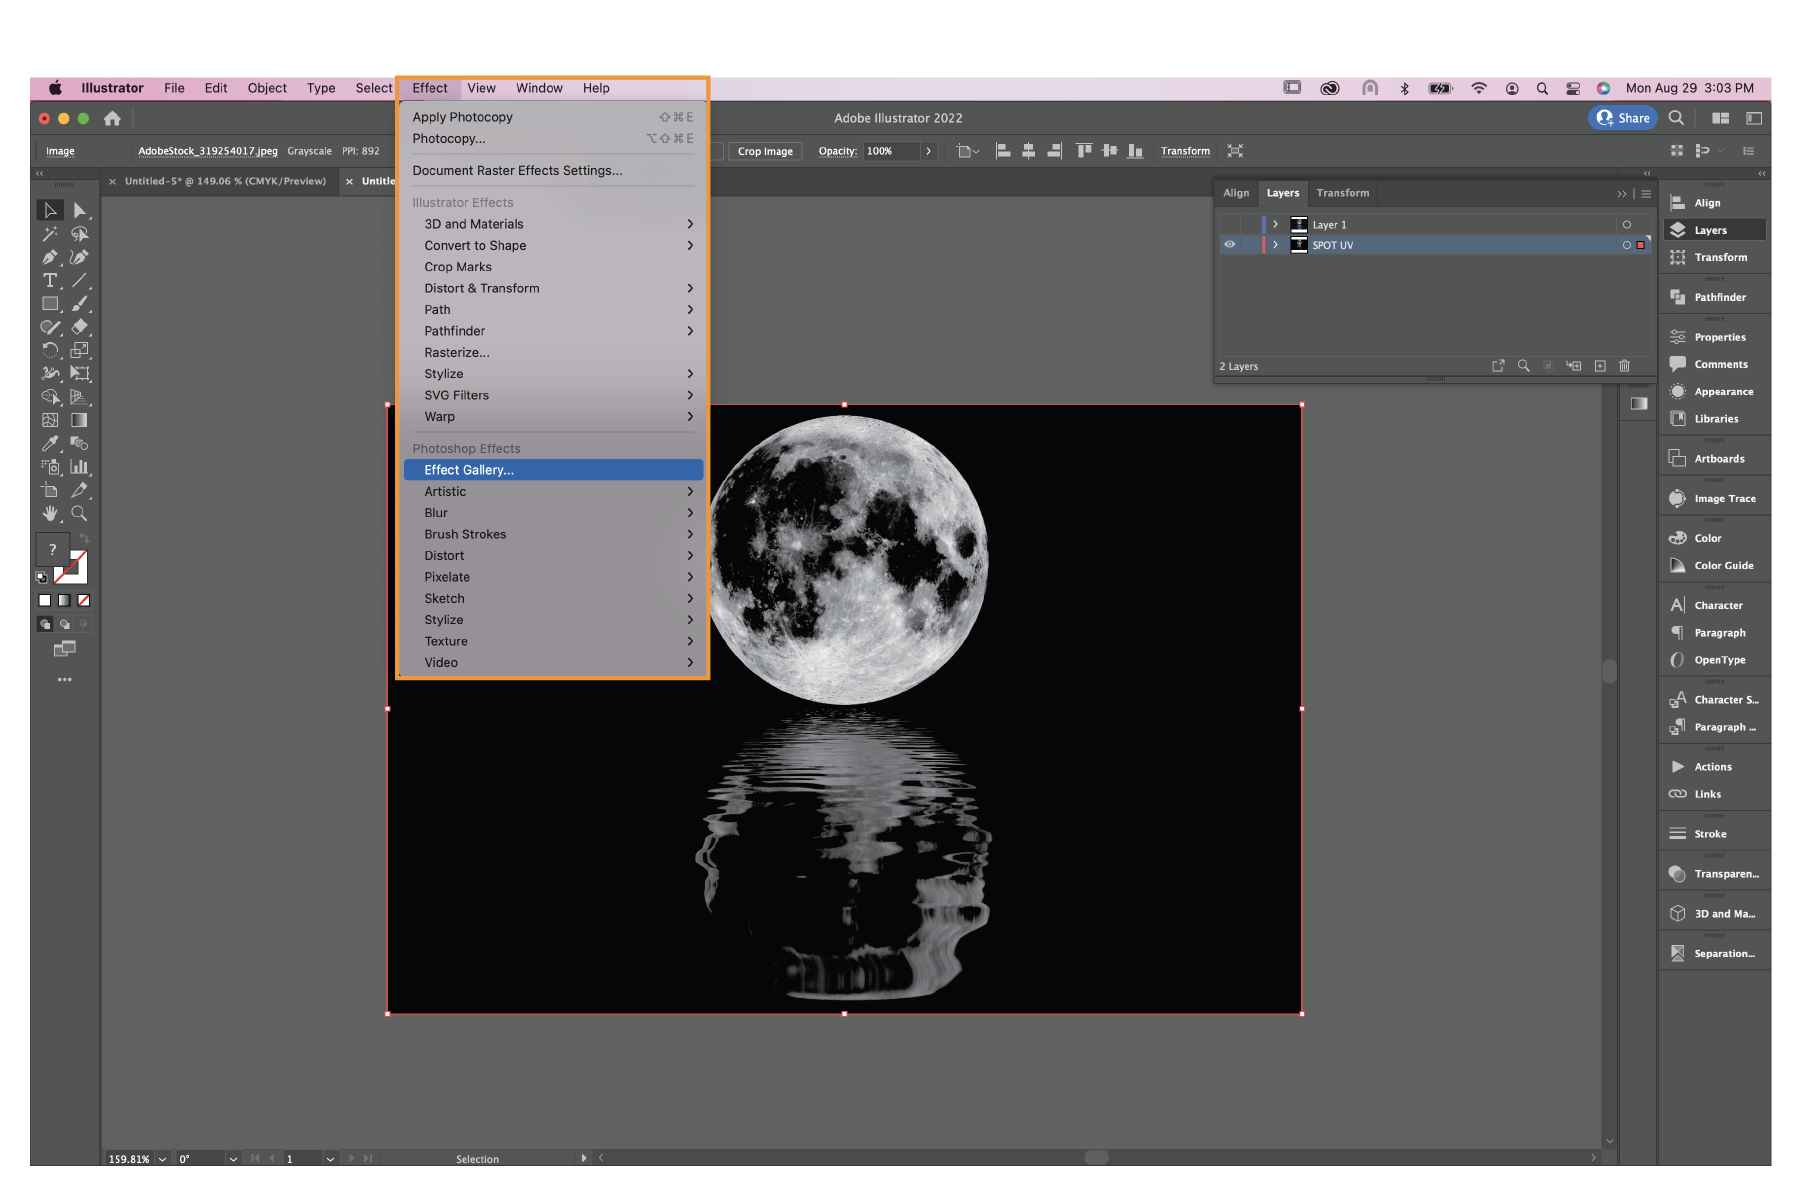
- Go to Effect → Effect Gallery.
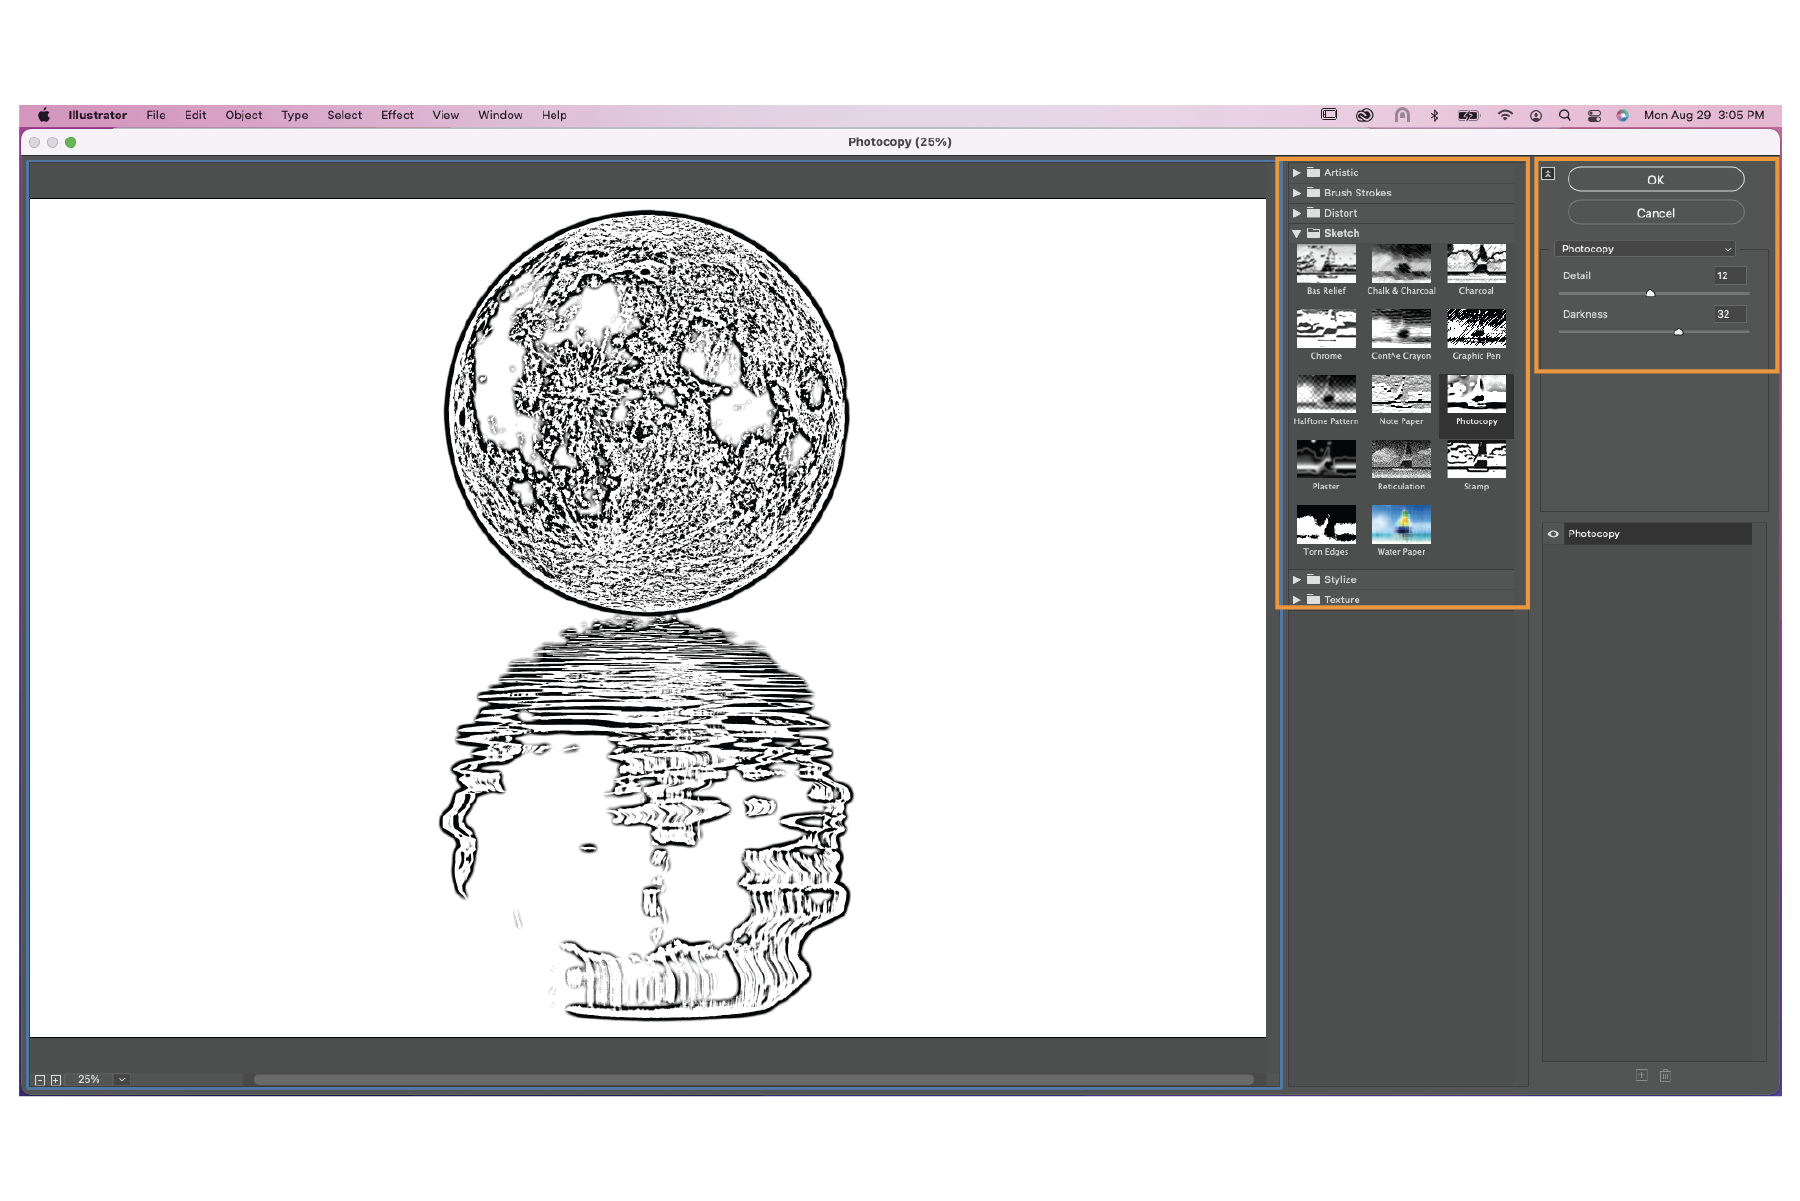
- Choose a filter that adds the texture you desire. We frequently use the “Photocopy” filter under the “sketch” folder.
- You can adjust the sliders on the right of the screen for different effects.
- Click “OK” when done.
4. Convert your image to vector
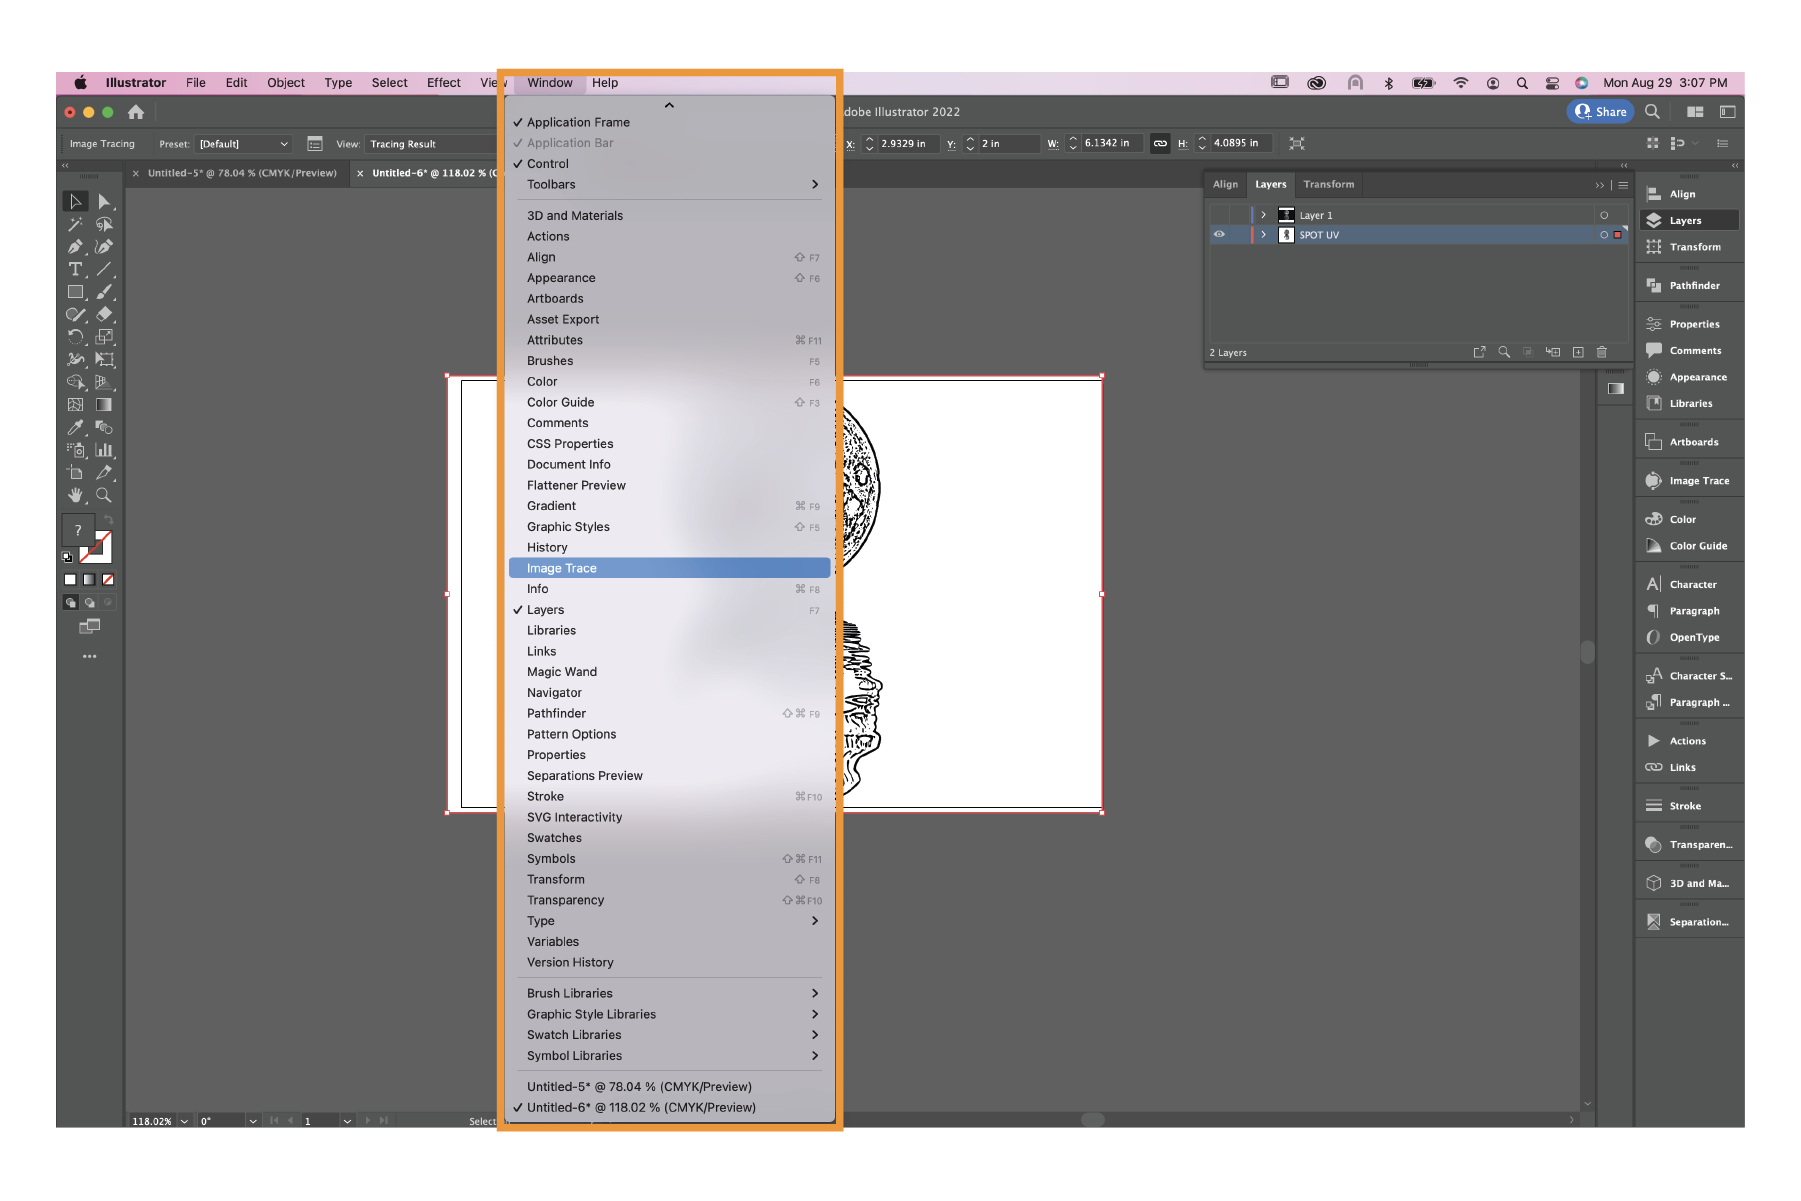
- If you don’t have Image Trace on your side panel you can find it under Window → Image Trace.
- Click the Image Trace button.
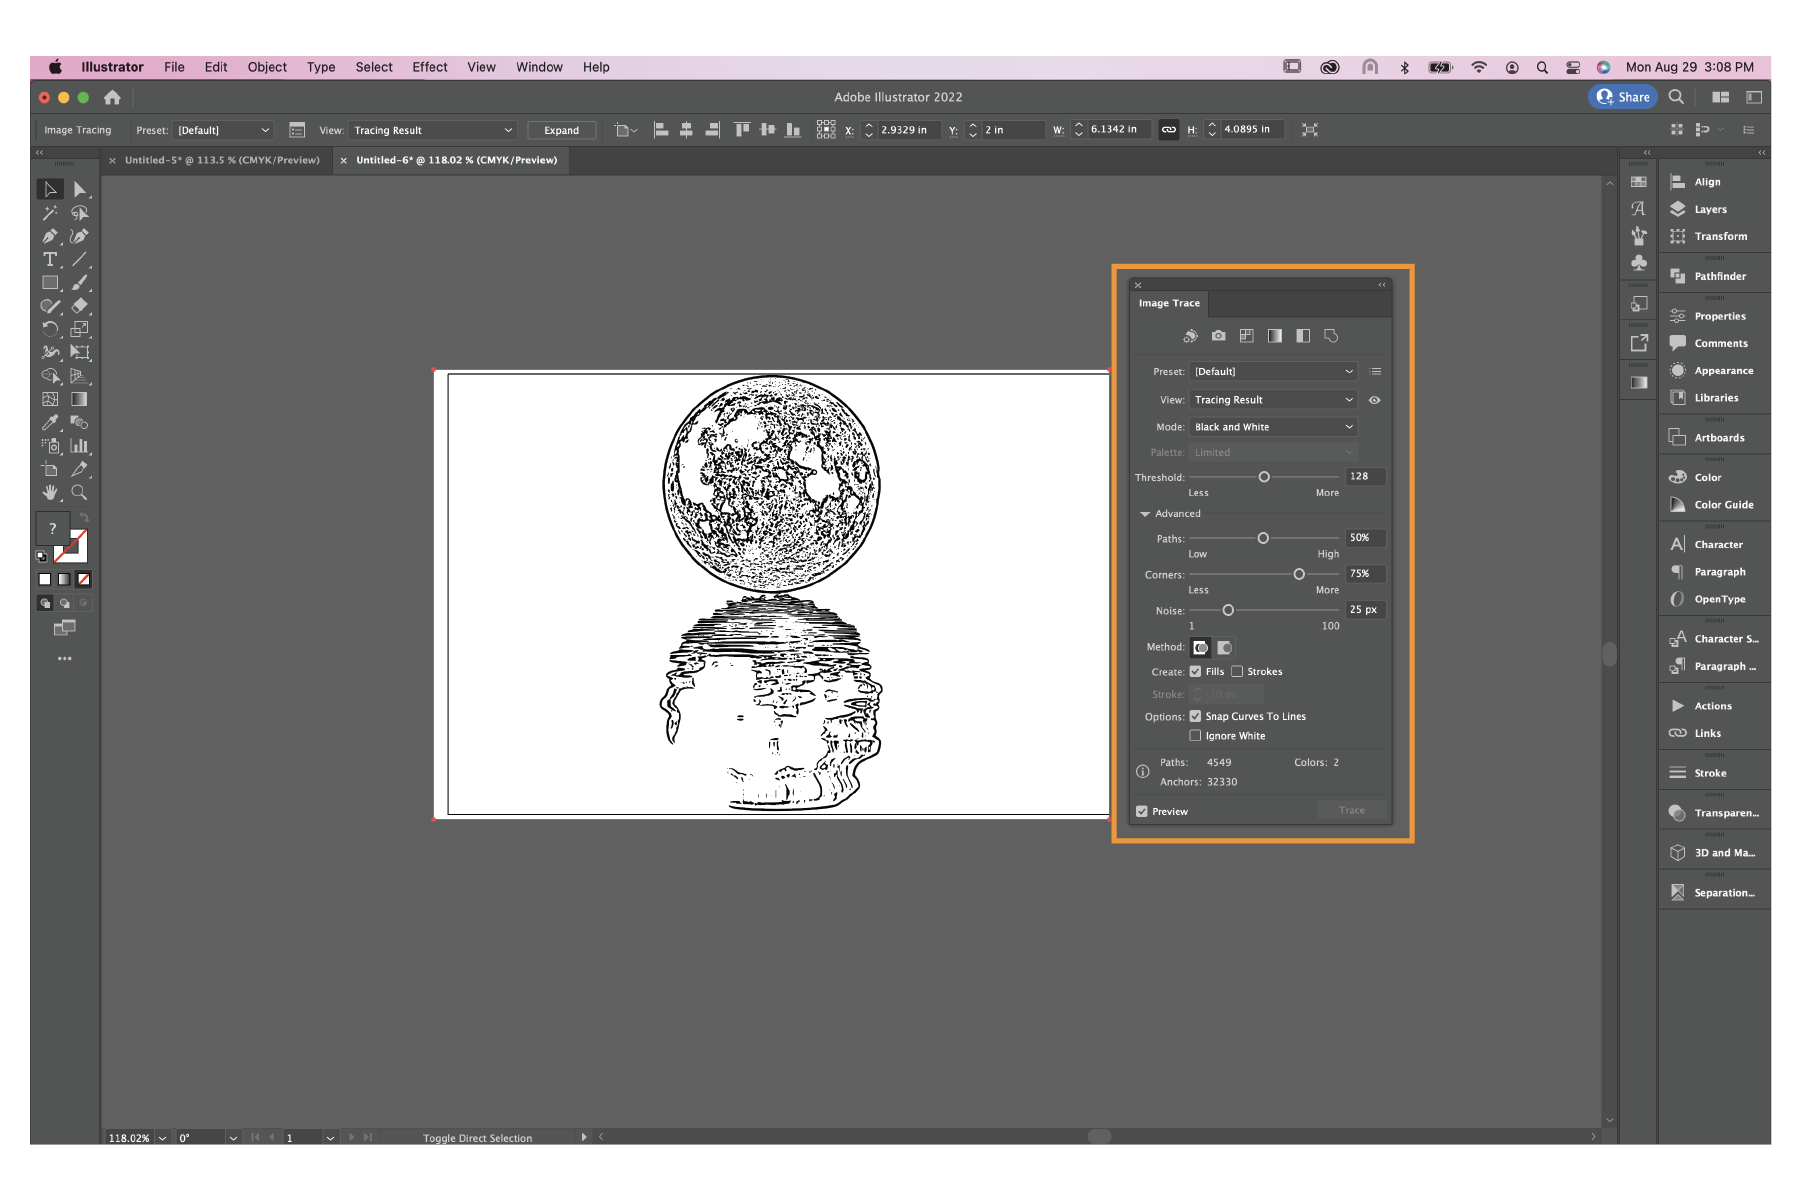
- Adjust the sliders on the Image Trace panel as you see fit.
- Once you have your image looking how you want it, press the Expand button.
5. Make any edits and export
- Once you have your vector file you can make additional edits as needed.
- If you are well experienced in Illustrator or Photoshop you can also create shapes and objects on this spot gloss layer, you just need to ensure that any areas you want the spot gloss on is in grayscale.
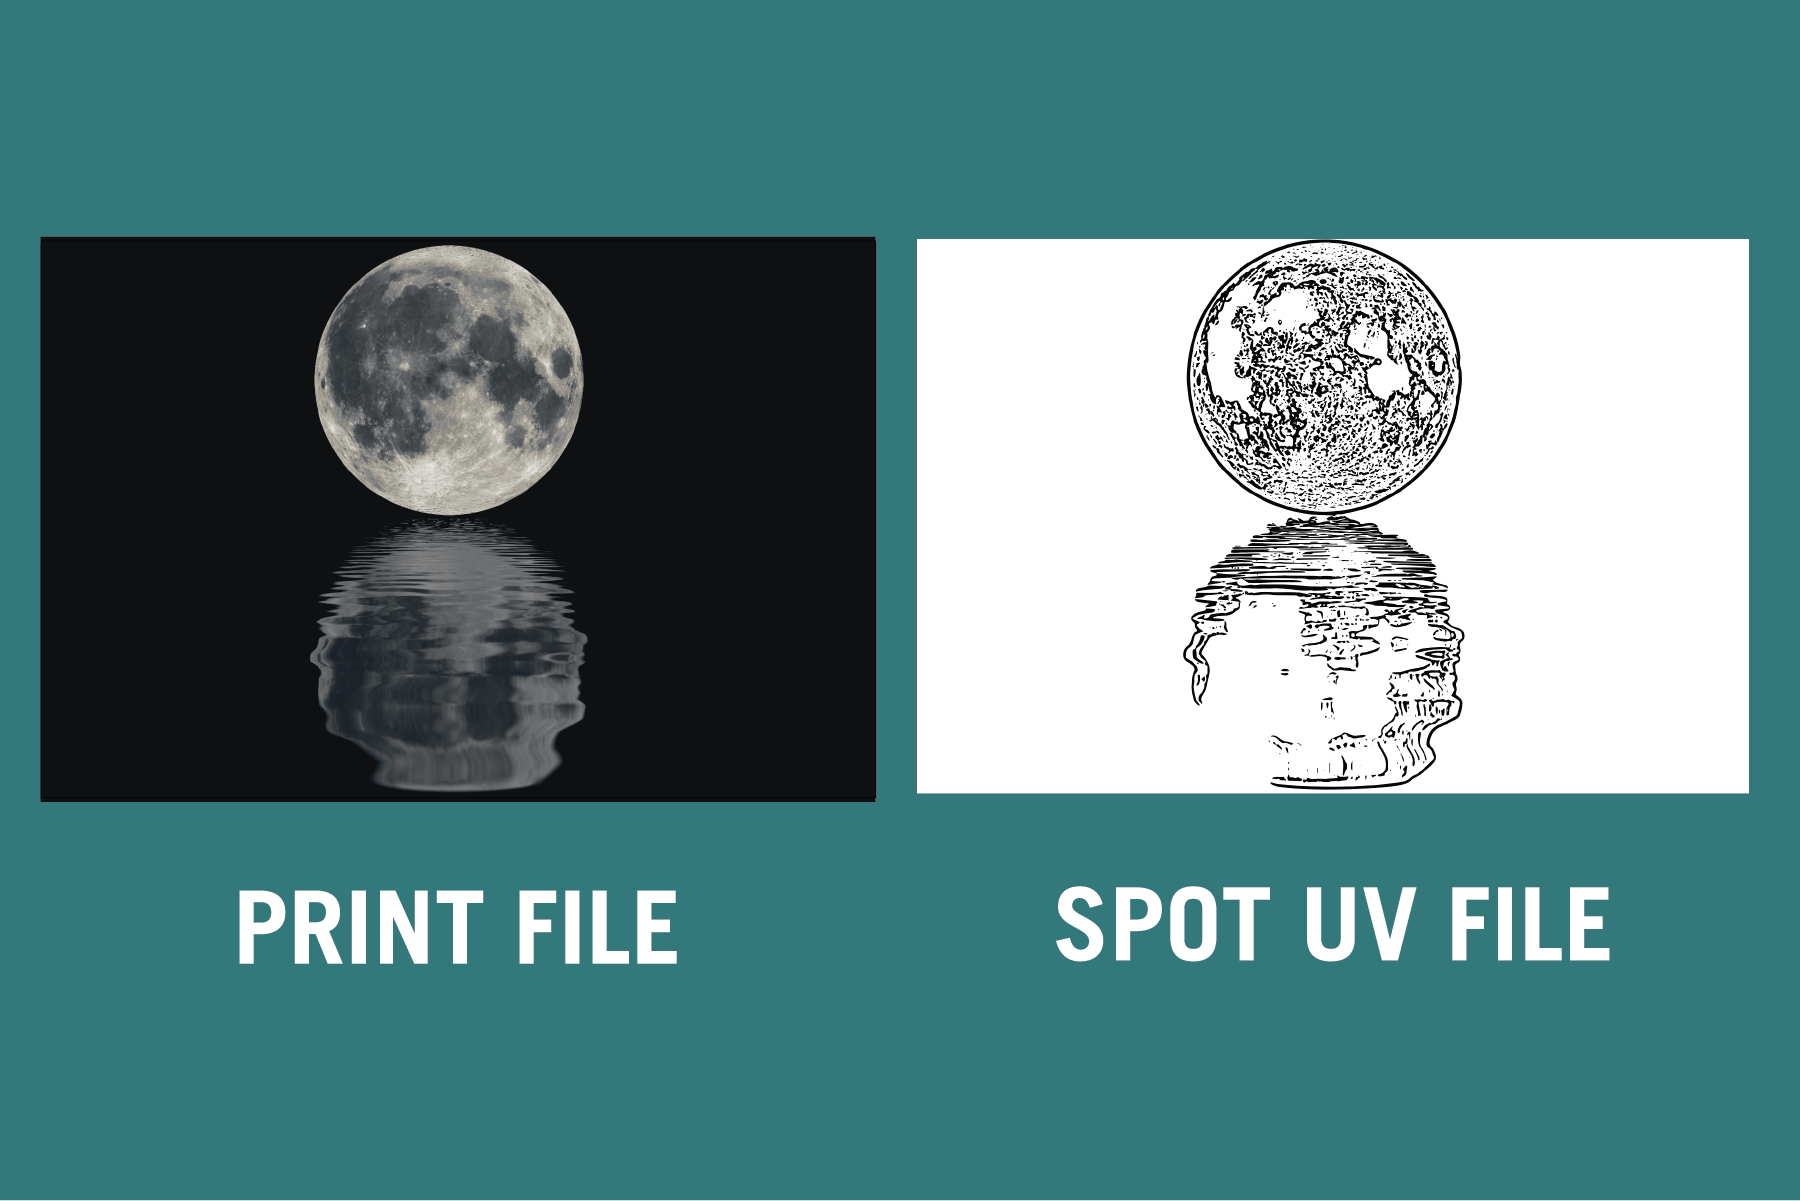
- When you are exporting your project as a PDF, export one PDF with just the top layer, this will be the PDF used for our printers. Then, export another PDF with only the spot gloss layer, this PDF will be read by our Duplo machine to add spot gloss. To see how to properly export your PDF with bleeds check out our blog post here.