

Understanding what bleeds are, how to properly use them, and why they are needed is key in ensuring your next print project comes out just how you want it. In this blog we’ll go over all of the above and include tutorials on how to add bleed using the most common programs.
1. What are bleeds?

A bleed is a section of artwork that goes beyond the edge of where the paper will be cut. This way when the print project is being printed, the print will be slightly larger than the desired size but then will be cut down to the appropriate size.
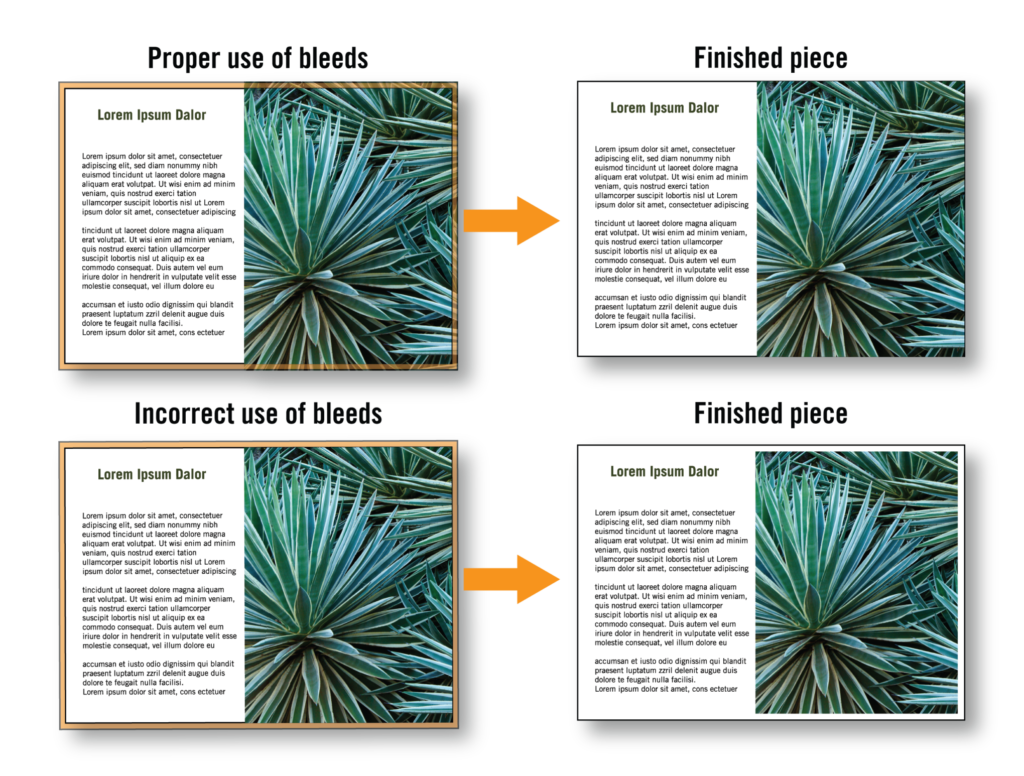
In the above picture, the thin green line indicates the final size of the print project (8.5 x 11″). The orange highlighted edge around the page indicates the bleed area. As you can see, the image of the plant goes past the final size edge into the bleed area; this will allow the image to “fall off” the page.
2. Why are bleeds neccessary?
We know that bleeds are necessary when you want a design or image to fall off the edge of the paper but understanding WHY is just as important. The reasoning for bleeds comes down to when your project is being cut. While cutting machines are very precise, they are not perfect and can have small margins of error.
Cutters cut large stacks of paper at one time, so when lining up the document the machine may cut the first page on top to perfection, while the very last page may have a small margin of error. Having bleeds that are far enough from the cut line prevent there from being any unwanted white border along the edge.
Notice in the image above that the card with the incorrect use of bleeds (not bringing the image to the edge of the bleed line) has a white border around the image where it is supposed to meet the edge.
3. How to properly use bleeds

Bleeds are usually set up to be 1/8 (.125) of an inch. This is a standard bleed size that does not need to be scaled to the document size. For example, if you are printing a 4 x 6 postcard or a 17 x 11 poster, they both would only need a .125″ bleed size.
When using bleeds you need to ensure that your images, color blocks, or anything else you want to fall off the page extend to the full length of the bleed line and you export with crop marks. The image above shows how a document should look when properly exported as a PDF.
4. how to setup and export your document with bleeds
Adobe Illustrator: Setup
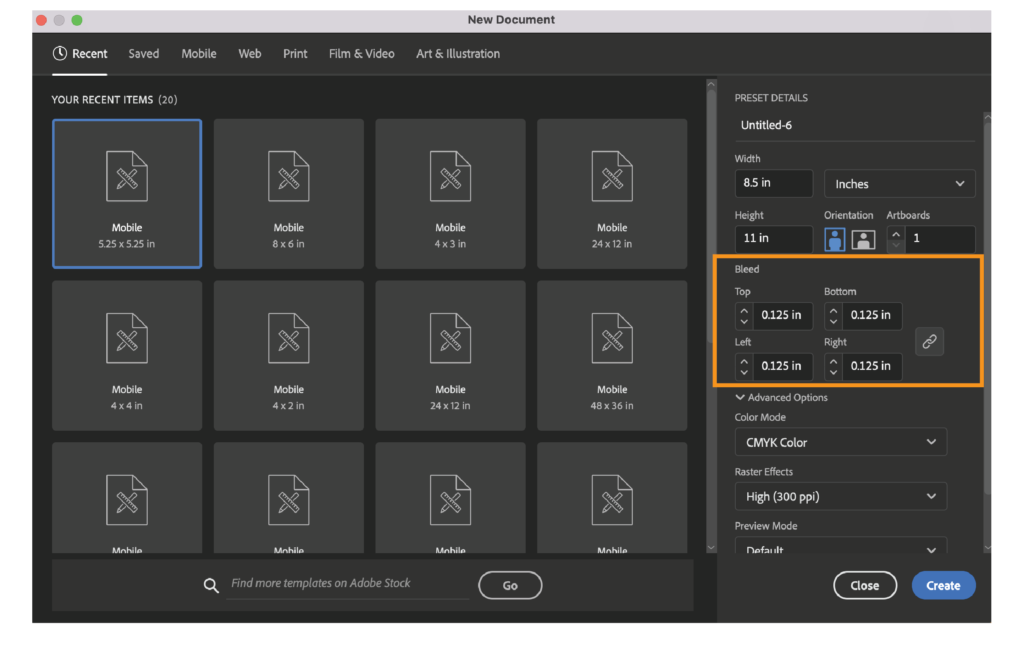
When you are first creating an artboard in Illustrator there is a section on the right side of the pop-up panel titled “bleed,” here you can adjust the bleed amount.

If you have already started your document and need to add bleeds you can go to File → Document Setup, here a pop-up window will show up where you can adjust your bleeds as necessary.
Adobe Illustrator: Exporting
When exporting from Illustrator first ensure that all images, color blocks, and design elements you wish to go to the edge of your print project have met the bleed marks fully. At Poor Richard’s Press, we take all print files in the form of a PDF, follow the below procedure to ensure proper exporting.
-
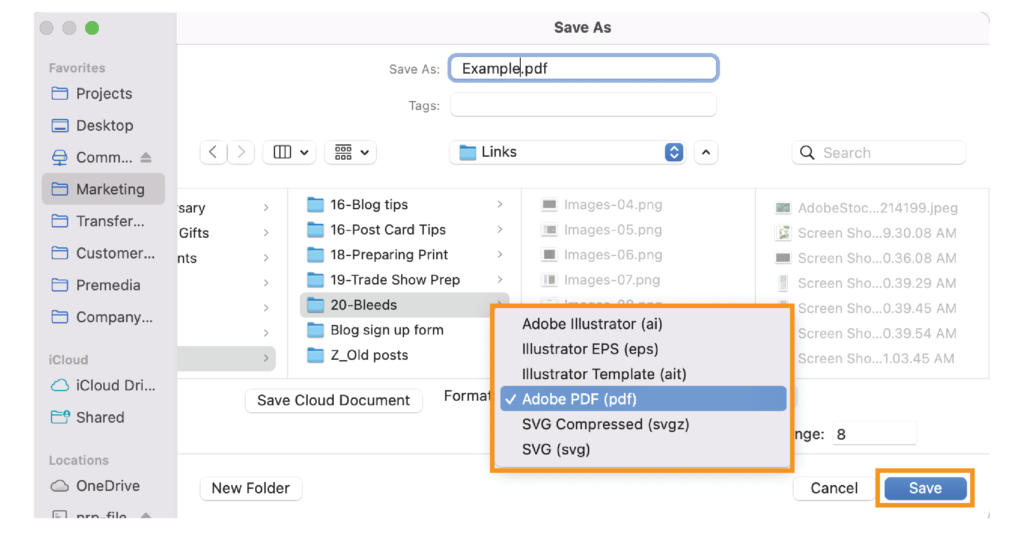
- Go to File → Save As…
- In the popup window select Adobe PDF (pdf) in the dropdown menu labeled “Format”
- Click “Save”
-
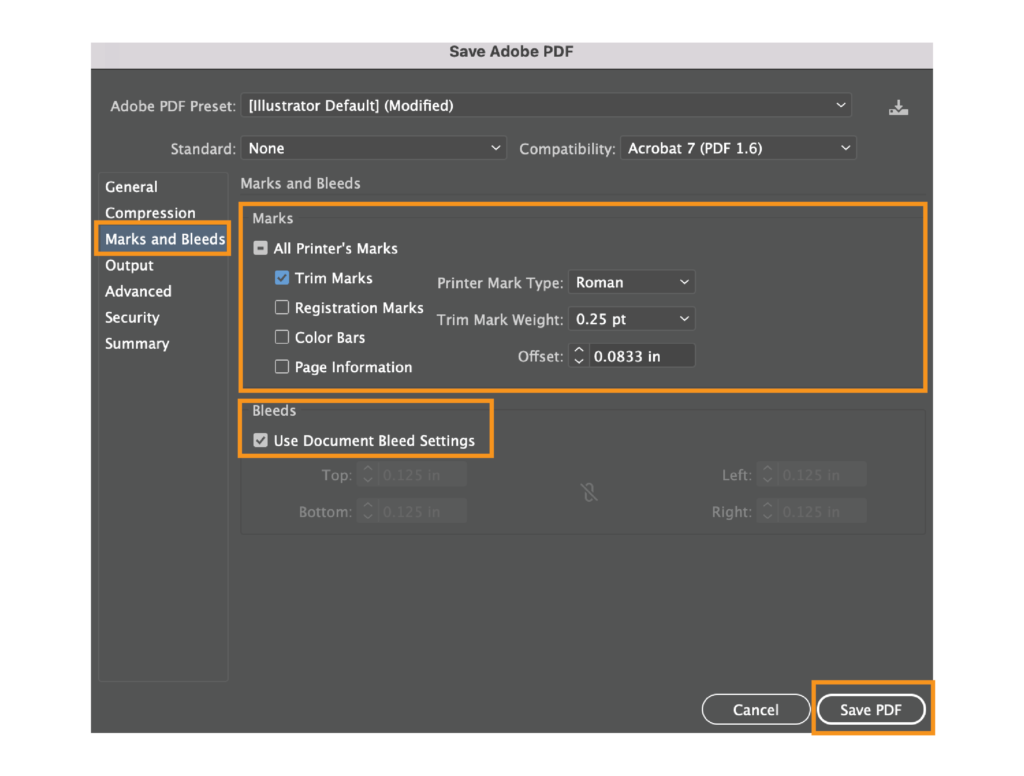
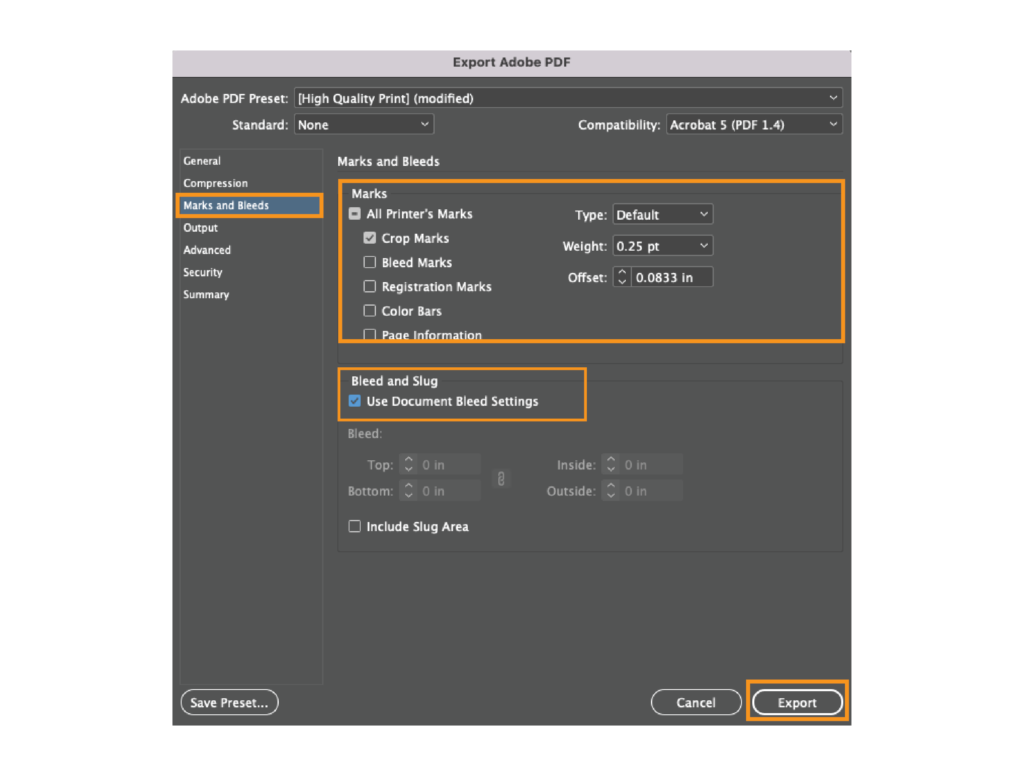
- In the next popup window go to the section labeled “Marks and Bleeds” on the left of the panel
- Ensure that “Trim Marks” and “Use Document Bleed Settings” are both checked
- Click “Save PDF”
Adobe InDesign: Setup
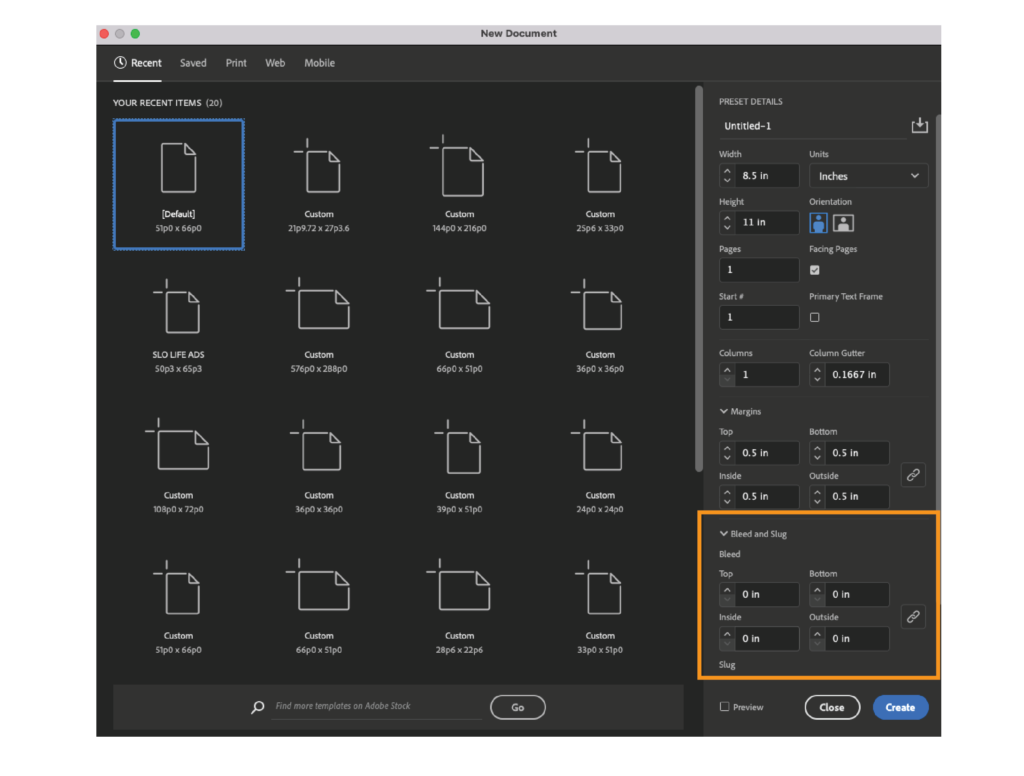
When you are first creating a document in InDesign you can set up the bleed on the right side of the panel labeled “Bleed and Slug.” You may need to scroll down and click on the dropdown menu to be able to access this section.
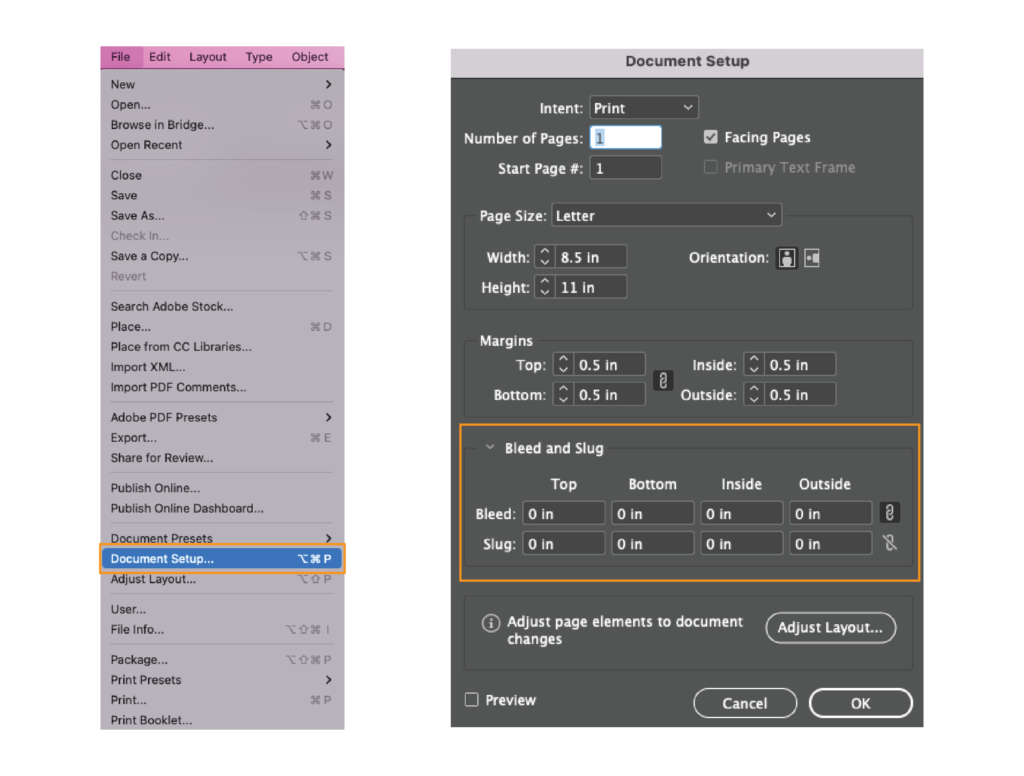
If you need to add bleeds to an already existing document, you can go to File → Document Setup and make the adjustments on the pop-up menu. Again, you may need to extend the dropdown menu titled “Bleed and Slug” in order to make changes.
Adobe InDesign: Exporting
When exporting from InDesign first ensure that all images, color blocks, and design elements you wish to go to the edge of your print project have met the bleed marks fully. At Poor Richard’s Press, we take all print files in the form of a PDF, follow the below procedure to ensure proper exporting.

-
- Go to File → Export
- In the popup window select Adobe PDF (print) in the dropdown menu labeled “Format”
- Click “Save”
-
- In the next popup window go to the section labeled “Marks and Bleeds” on the left of the panel
- Ensure that “Trim Marks” and “Use Document Bleed Settings” are both checked
- Click “Export”
Canva: Setup
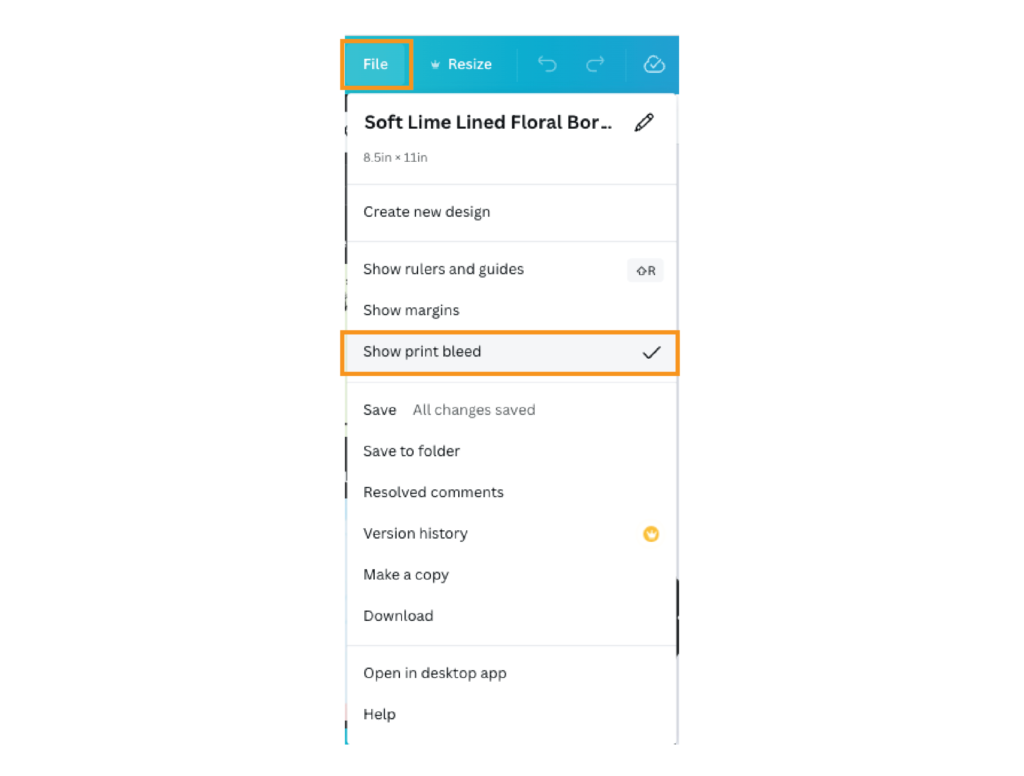
While we do recommend using a software other than Canva for creating print items, you can add a bleed to your document following these steps. Open your design and in the top left corner click on File → Show print bleed.
Canva: Exporting
When exporting from Canva first ensure that all images, color blocks, and design elements you wish to go to the edge of your print project have met the bleed marks fully. At Poor Richard’s Press, we take all print files in the form of a PDF. Please note that we do not recommend using Canva to create print PDFs, however, if you do choose to use Canva follow the below procedure to ensure proper exporting.
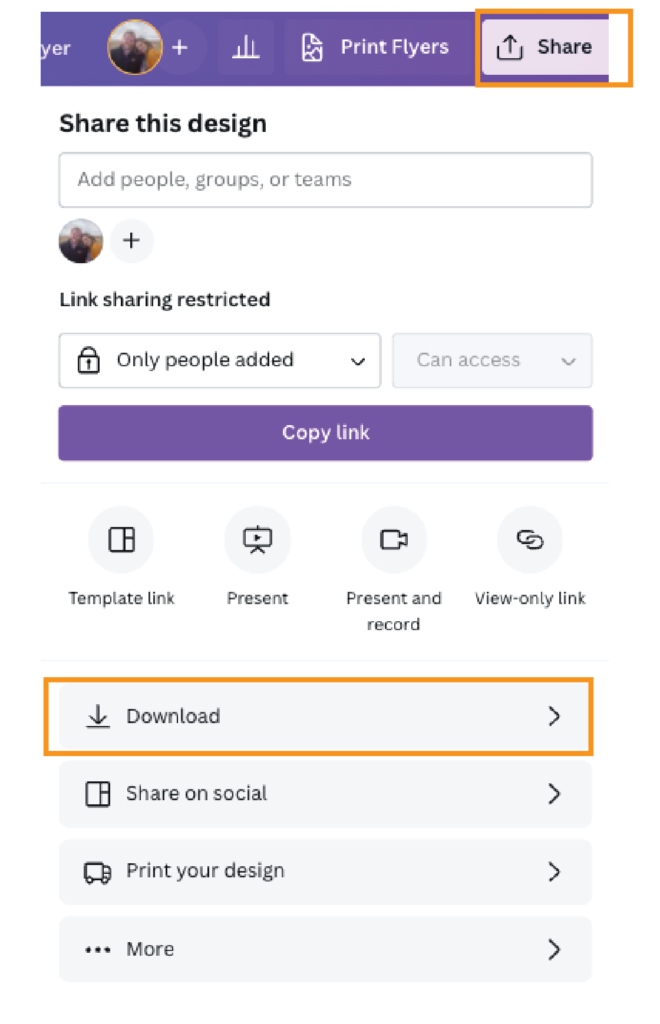
-
- Go to Share → Download
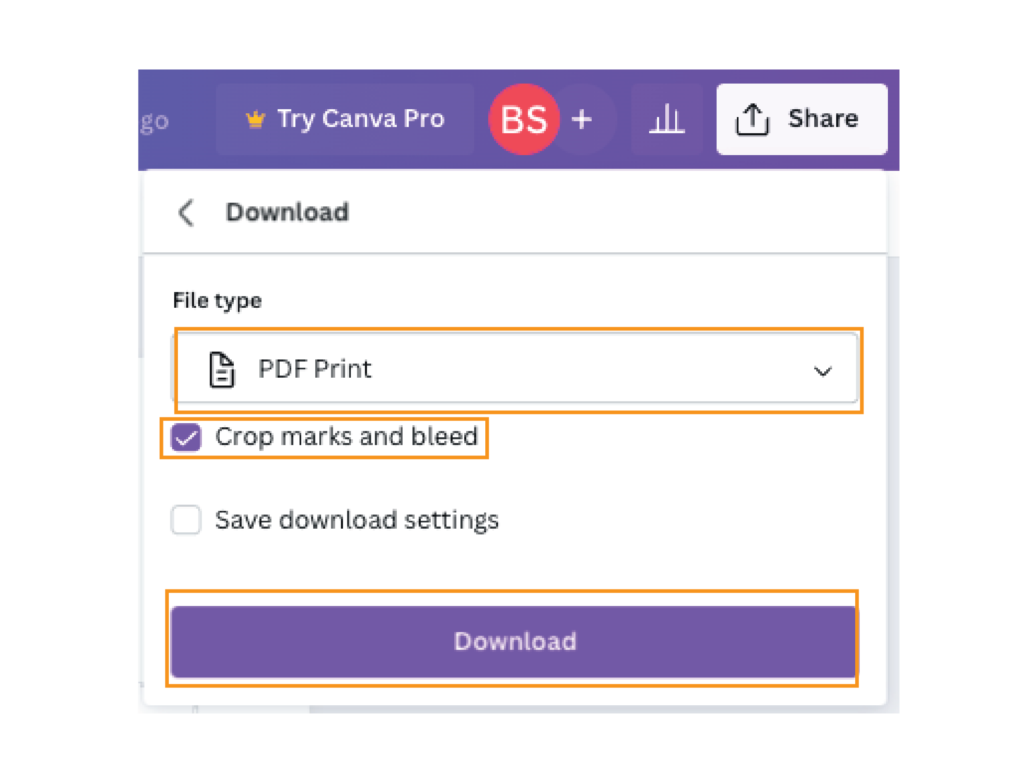
-
- Under “File Type” choose PDF Print
- Make sure “crop marks and bleed” is checked
- Click Download
We are here to help!
Need assistance or have additional questions about bleeds on your project? Reach out to one of our experts here.